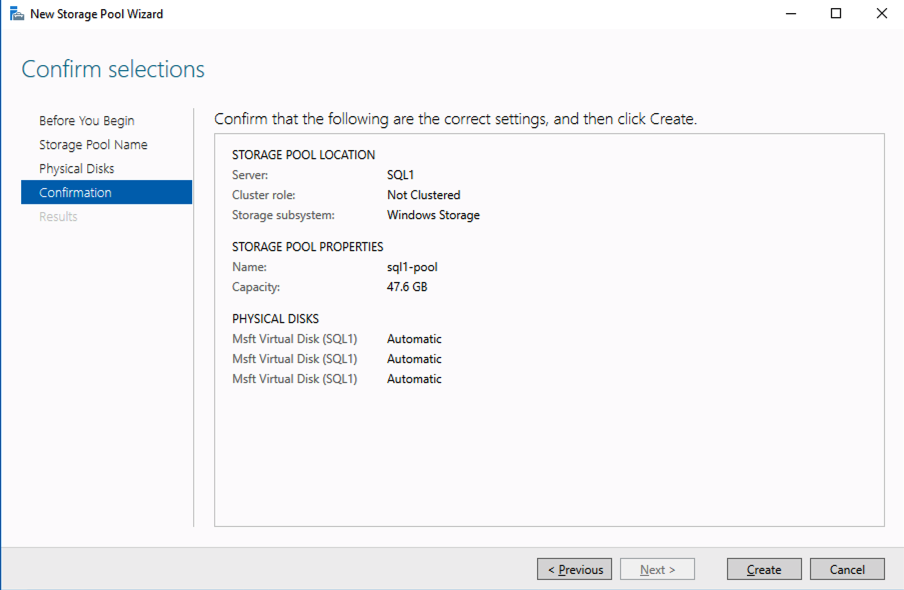
Enterprise Availability: Lessons from the Court
I love basketball. I love to play it, watch it, and think through the cerebral aspects of the game; the thoughts and motivations, strategy and tactics. I like to look for the little things that work or fail, the screen set too soon or the roll that happened too late. I like defense and rotation. I like to know the coaches’ strategy for practice, walkthroughs, travel, and so on. So naturally a few months ago, when I had a day off from the 24/7 world of availability, imagine that, I took my day off to watch basketball, and more specifically my daughter’s middle school basketball practice.
About a third of the way through watching, I couldn’t contain myself. I whistled to and “prodded” the young girl lollygagging and trotting up the court and yelled, “Run! Hustle!” And she did, as did the teammates within earshot. The next few minutes, plays, and drills were filled with energy, crisp cuts, smooth motions, and drive. But, it didn’t last. Instead, there were more whistles required, more emphatic pleas to move and run, to play hard, make sharp cuts, dive, pay attention, focus, learn, and correct. When the 2 hours were nearly over I took my last moment of attention to prophesy, “The way you practice will be the way you play!”
I can almost feel you channeling the spirit of AI, not Artificial Intelligence (AI), Allen Iverson (AI). “Are we talking about, practice. Practice!” I thought this was about availability. Well, my love for basketball met my passion for availability when I considered my daughter and her teammates. How?
Three Ways Basketball Strategies Are Like Availability Strategies:
- In basketball, every team needs a plan, ditto for enterprise availability.
- In basketball, every team needs to practice that plan, ditto for availability, disaster recovery, and especially planned maintenance.
- In basketball, the plan when tested under fire will hold up only as good as those plans were practiced
Enterprise Availability Needs a Plan
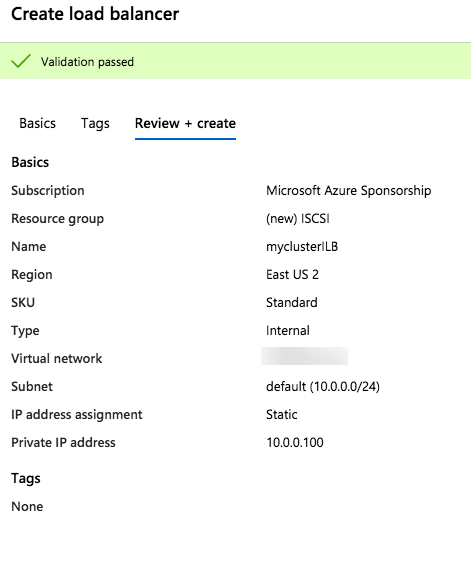
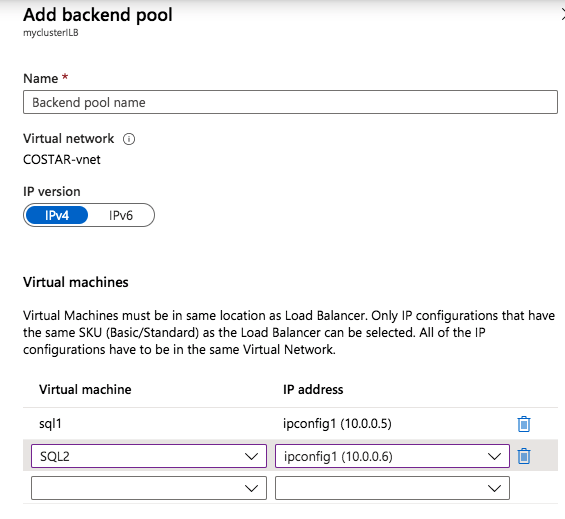
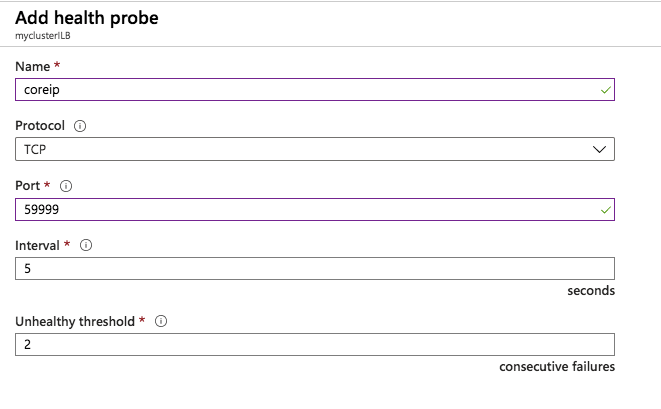
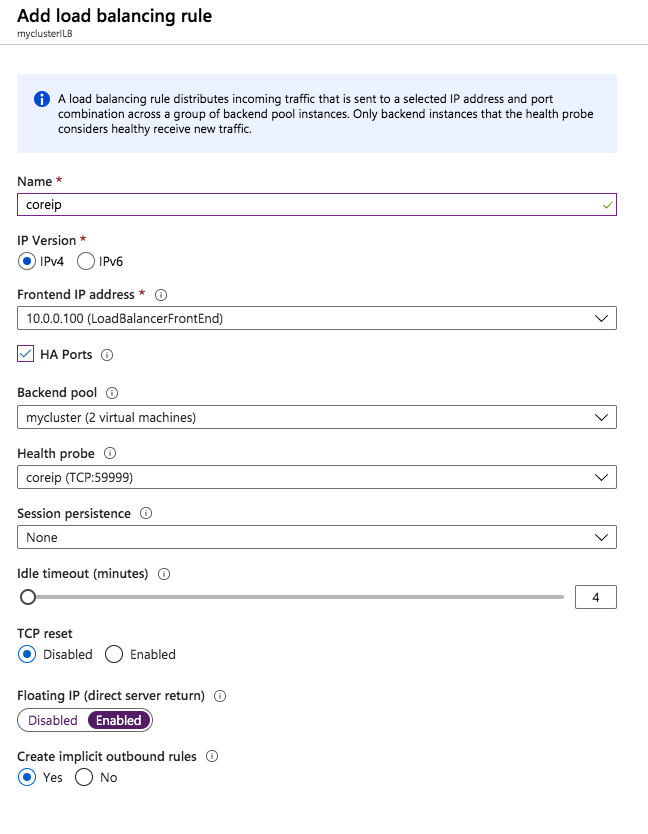
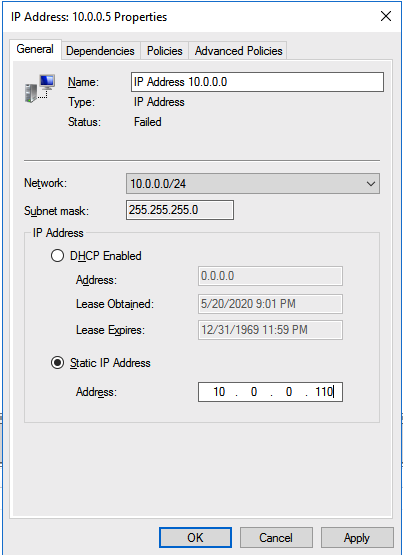
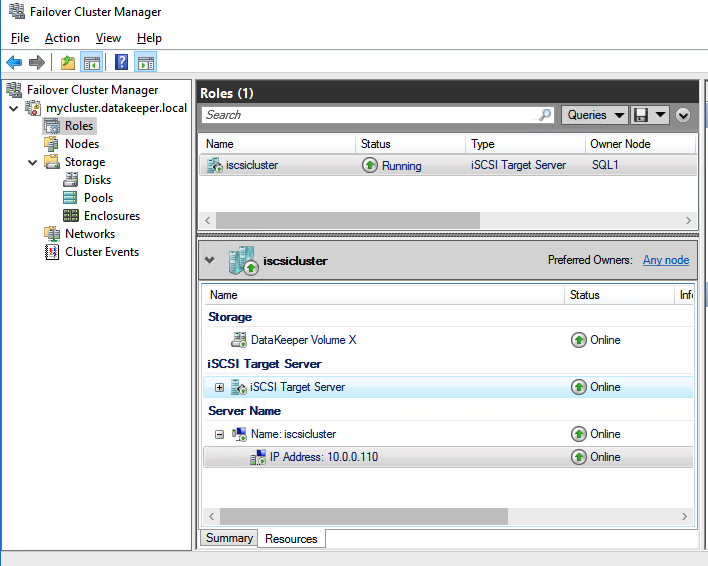
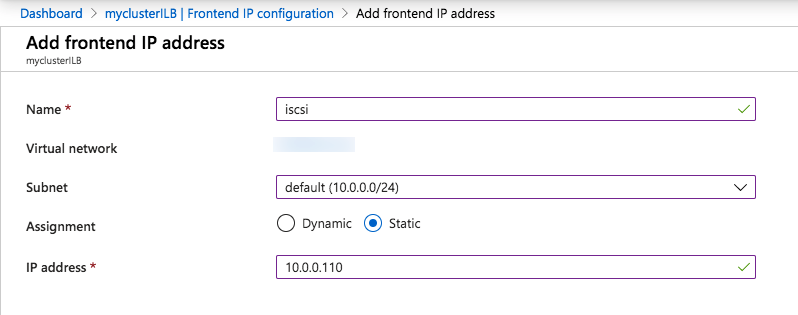
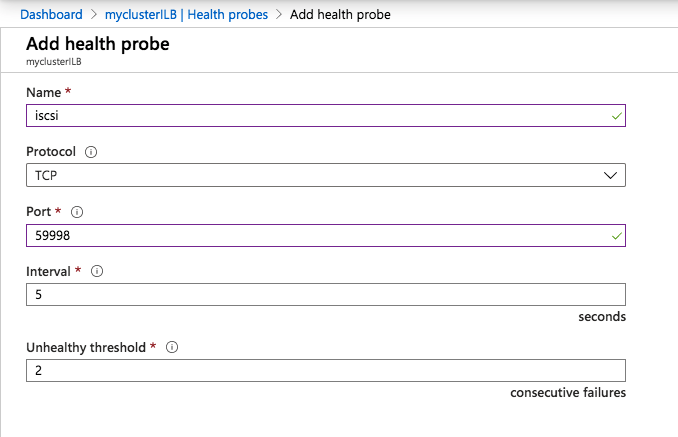
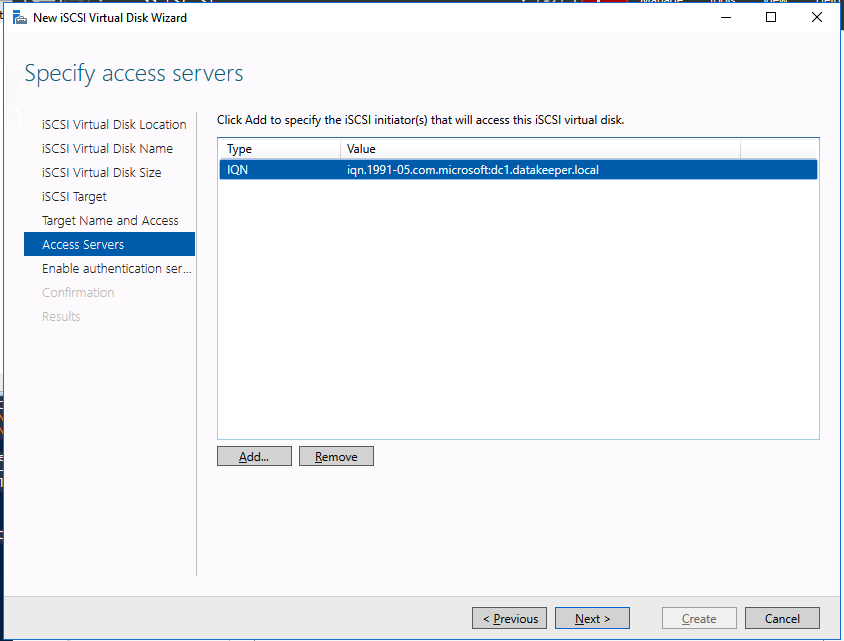
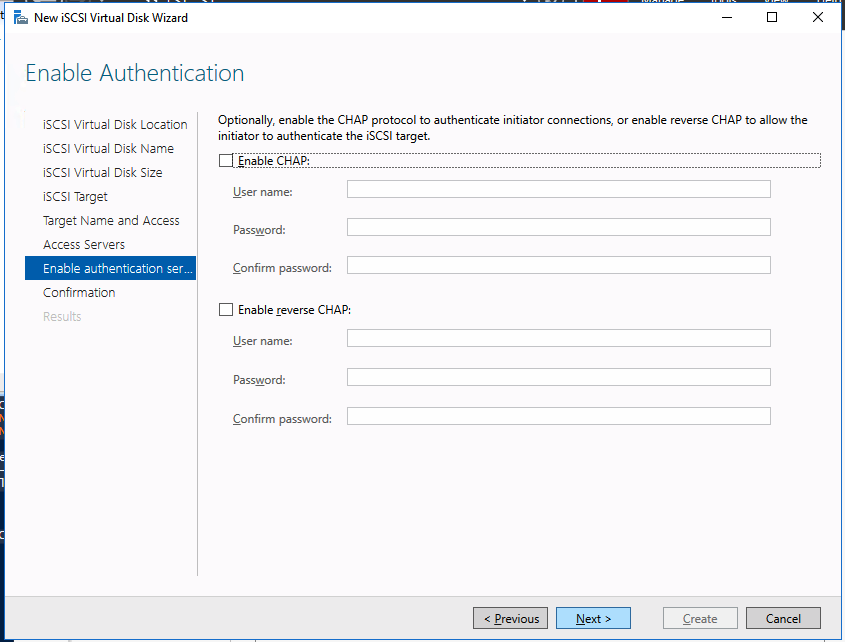
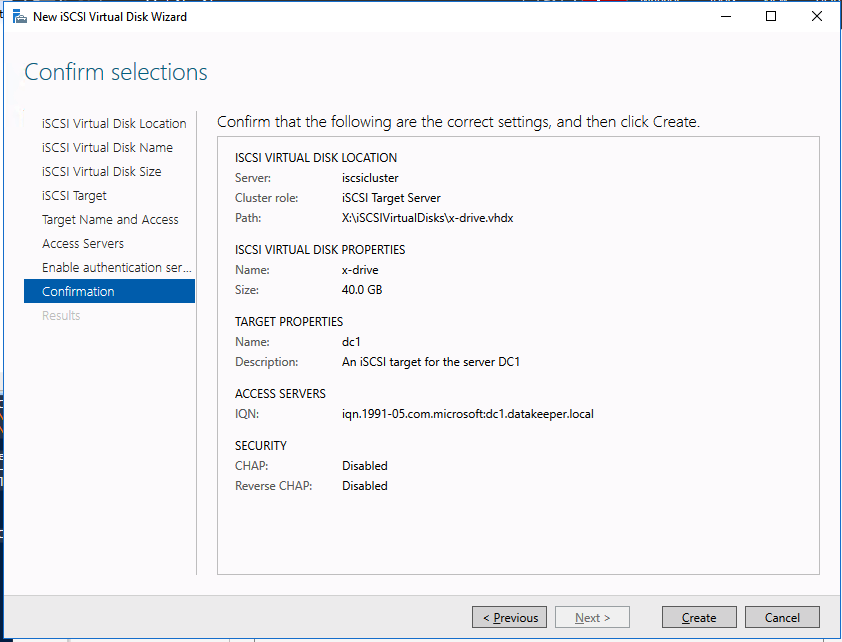
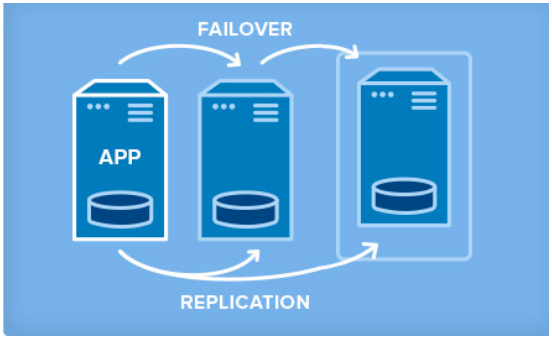
Your availability, specifically your disaster, planned maintenance, and outage recovery strategies, are only as good as those you create. Simply put, what is your plan for an outage (note clouds fail, servers crash, networks get saturated, and human error— enough said). Do you have a documented plan? Do you have identified owners and backups owners? Do you know your architecture and topology (what server does what, where is it located, what team does it belong to, what function does it serve, what business priorities are tied to it, and what SLO/SLA does it require)? Who are your key vendors, and what are their call down lists? What are your checkpoints, data protection plans, and backup strategies? And what are your test plans and validation plans for verification of this plan?
Enterprise Availability Needs Practice
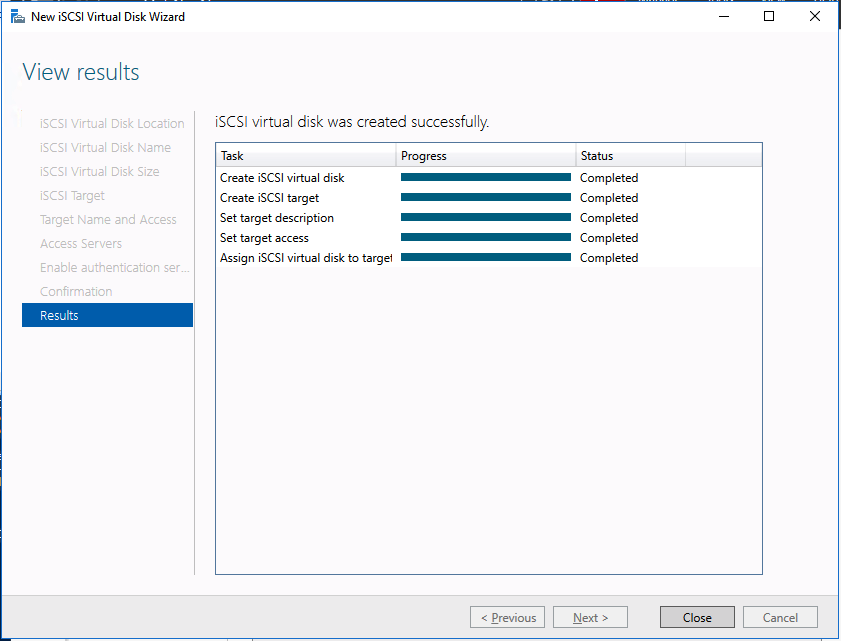
A good plan, check. Now what about practice. Implementing disaster recovery steps and unplanned outage strategies are a necessary component of every, every enterprise configuration. But, a strategy that is not rehearsed is not really a strategy. In that case it is simply a possible and proposed approach. It is more like a suggestion, rather than an actual plan of record. The second step is practice. Walk through the strategies of your plan. Rehearse maintenance timings. Restore backups and data. Validate assumptions and failure modes.
Enterprise Availability Requires Testing
A plan and a walkthrough, check. Now that you have two of the three let me go back to my daughter’s team. My parting words, as an “unofficial coach “ were as follows: “The way you practice will be the way you play!” Fast forward three days. The game is down to the final minutes. The team they are playing is athletically mismatched, and outsized just as they were last year when that year’s game was over by halftime. But this year, the undermanned and undersized team had clearly come in more prepared. What should have been an easy win now enters the final minute nearly tied. The home team, the opponent, begins a press— something my daughter’s team had prepared for, albeit haphazardly and lethargically, during that fateful practice. What ensued wasn’t pretty. Four unforced turnovers, two critical fouls during three-pointer attempts, a four to nothing run, and a bevy of frustrations culminating in a devastating one-point loss as time expired.
My final point, how well are you practicing for your real outage, disaster, or planned maintenance? Do you practice with real data, real clients, and with a real sense of urgency? How often does your upper management check-in? Trust me, the presence of a boss in pressure-packed moments makes people do strange and unwise things! Does your sandbox and test system look like production? In a past life, I once worked with a customer who had different hardware, storage and Linux OS versions between prod and QA. When they went into prod with application updates, disaster struck hard. Do you have users and data, and jobs that run during your testing? What about actual disaster simulation? It’s a hard pill to swallow, testing a hard crash with potentially destructive consequences, recovery from offsite, and even harder to simulate simultaneous multi-point, multiple systems failures, but the unpracticed is often the weak point that turns a 2 hour planned maintenance into an eight-hour multi-team corporate disaster. The under-practiced or poorly practiced is the difference between a stunning victory for your strategy and team, or a crushing defeat and costly failure for team, vendors, enterprise, and customers.
In basketball, the plan under fire will hold up only as good as the plan was practiced. When implementing a recovery and disaster plan a good plan and validation are key, but great practice is king.
Contact a rep at SIOS to learn how our availability experts and products can help you with the plan, procedures, and practice.
Visit back for a post on tests you should never avoid simulating.
— Cassius Rhue, VP, Customer Experience
Article reproduced from SIOS