SIOS SANless clusters

SIOS SANless clusters High-availability Machine Learning monitoring

  • Home
  • Products
    • SIOS DataKeeper for Windows
    • SIOS Protection Suite for Linux
  • News and Events
  • Clustering Simplified
  • Success Stories
  • Contact Us
  • English
  • 中文 (中国)
  • 中文 (台灣)
  • 한국어
  • Bahasa Indonesia
  • ไทย

How to Set Up a DataKeeper Cluster Edition (DKCE Cluster)

January 30, 2024 by Jason Aw Leave a Comment

How to Set Up a DataKeeper Cluster Edition (DKCE Cluster)

How to Set Up a DataKeeper Cluster Edition (DKCE Cluster)

What is a DKCE cluster?

DKCE is an acronym for DataKeeper Cluster Edition. DKCE is a SIOS software that combines the use of DataKeeper with features of Windows Failover Clustering to provide high availability through migration-based data replication.

The steps to create a DKCE cluster

For this example, I will set up a three-node cluster with the third node maintaining node majority.

Step 1: You must have DataKeeper installed on 2/3 of your systems to set up a DKCE cluster. Click on the following link to follow our quick start guide to complete this install: https://docs.us.sios.com/dkce/8.10.0/en/topic/datakeeper-cluster-edition-quick-start-guide

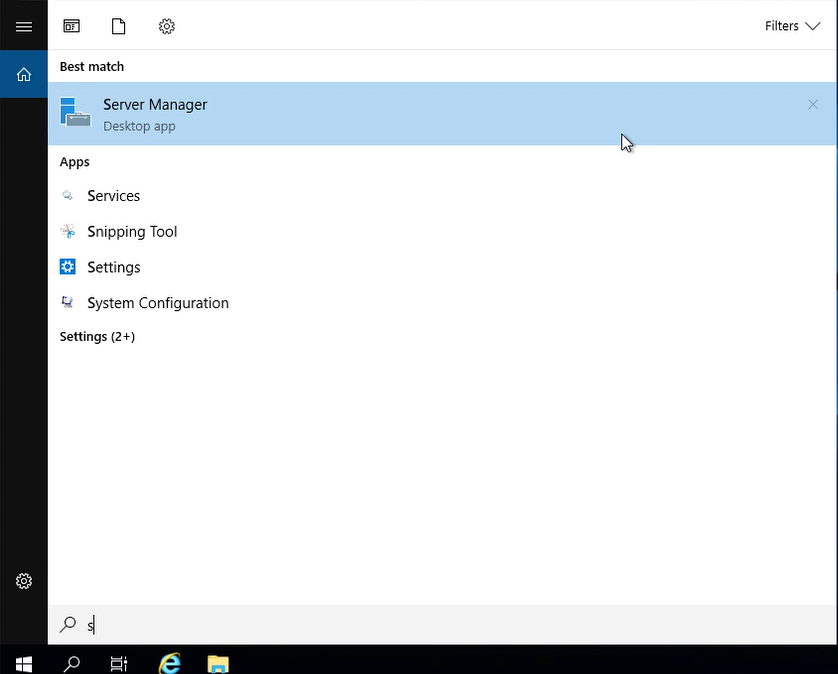
Step 2: Add the servers that you plan on managing in the Server Manager. This will need to be done on all servers you plan on adding to the cluster.

On your server navigate to Server Manager
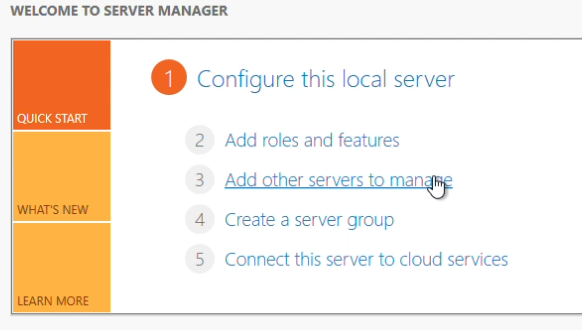
Click “Add other servers to manage”
I added the servers by their name here. To do so this way you will need to verify your system name and IP entries in the host file, located here: C:\Windows\System32\drivers\etc\hosts

After all servers have been added, you can verify by navigating to “All servers” in Server Manager

Step 3: You may notice a winRM error, to bypass it run this command in PS as an administrator. Run this command to add servers in your cluster as trusted hosts. This command will need to be run on every system in your cluster.

Set-Item WSMan:\localhost\Client\TrustedHosts -Value ‘<name of server 1>,<name of server 2>’

Step 4: Install Failover Clustering

Follow these steps to install failover clustering.

Step 5: Navigate to the Failover Cluster Manager
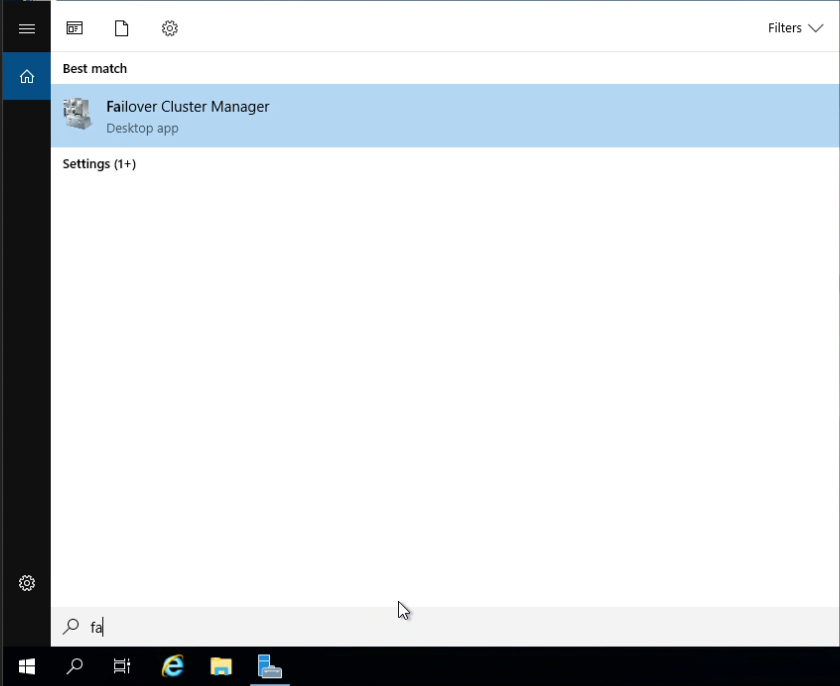
Step 6: Click “Create Cluster”

Step 7: Next, add the servers that should be in the cluster and click “Add” after each entry.

Step 8: The list should be similar to the one in the following image

Step 9: Choose “Run all tests” for the validation test, and click Next.

Step 10: Once the tests have been completed, click “Finish”

Step 11: Name your cluster, I have named this one “Cluster1”, click “Next”

Step 12: Verify “Add all eligible storage to the cluster” is checked, click “Next”

Step 13: Once step 12 is completed, click “Finish”

Step 14: In Failover Cluster Manager, the cluster will initially be offline. I will be assigning an unused IP to bring it online. In the “Cluster Core Resources” right-click on the IP address resource and select Properties.

In the properties panel, my subnet mask is /28, therefore I will choose an available IP within the range, 12.0.0.14. Click “Apply”

In the “Cluster Core Resources” right-click on the cluster and select “Bring Online”
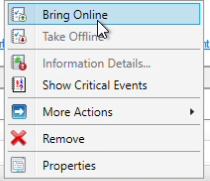
The resources should now be online

Step 15: Navigate to DataKeeper

Step 16: Right-click on Job and click “Create Job” to begin creating our first mirror

Give the job a name I am naming my job “job1”, and click “Create Job”

Choose the source and volume to replicate data from. I have chosen Box1 as my source, and volume D, click “Next”

Next, choose a server and a volume to be the target. I have chosen Box2, and volume D.

A prompt will appear to ask you to auto-register the volume you have created as a WSFC volume,  select “Yes” to make this volume Highly Available.

In DataKeeper you can now see that the volume is currently mirroring.

Step 17: In Failover Cluster Manager, navigate to Storage, then Disks. You will see the volume that you have auto-registered is WSFC.

Step 18: Let’s verify the Owners that should be checked. Right-click on the volume, and click “Properties”

Since I need a third to be a witness and maintain node majority, Box3 will need to be unchecked / remain unchecked.

Step 19: Now we can test a migration through Failover Cluster Manager. Navigate to File Explorer and create a new text file in the volume that is currently being mirrored. Do this on your Source.

Navigate to Failover Cluster Manager, click “DataKeeper Volume D” and select “Move Available Storage” from the Actions pane.

Right-click “Best Possible Node”. This should automatically migrate to your target.

In Failover Cluster Manager verify the owner of “DataKeeper Volume D” is now the target node

Navigate to DataKeeper to verify that your target is now the Source, and vice versa.

Successful DKCE Cluster Setup

You have completed the setup of a DKCE cluster.

SIOS provides resources and training for all our products.

Reproduced with permission from SIOS

Filed Under: Clustering Simplified Tagged With: cluster, DKCE

Achieving HA/DR for SQL Server Without Breaking the Bank

June 30, 2023 by Jason Aw Leave a Comment

Achieving HADR for SQL Server Without Breaking the Bank

Achieving HA/DR for SQL Server Without Breaking the Bank

High availability and disaster recovery (HA/DR) are essential requirements for all database environments, especially mission-critical ones. However, many businesses face challenges in achieving HA/DR without significantly inflating costs. If you’re grappling with these issues, this article will shed light on an effective solution.

SQL Server Standard Edition is widely used, but it comes with certain limitations: it supports only two nodes in a cluster. However, by leveraging the capabilities of SIOS DataKeeper Cluster Edition, you can overcome this limitation, enabling replication of data to a third node for disaster recovery.

This strategy could save you over 70% on your SQL Server licensing by allowing you to use SQL Server Standard Edition to create a SANLess SQL Server Failover Cluster Instance (FCI) instead of upgrading to SQL Server Enterprise Edition and using Always On Availability Groups.

This blog post aims to guide you through the process of using SIOS DataKeeper for data recovery on a third node that is not part of the cluster.

Configuring Your Nodes

In this scenario, let’s consider that you have two nodes, namely DataKeeper-1 and DataKeeper-2, configured in a cluster. These nodes have their E drive replicating with each other. Also, DataKeeper-1 is replicating to a third node, DataKeeper-3, which is not part of the cluster. It’s important to note that with SQL Server Standard Edition, the third node can never be part of the cluster.

Preparing the Third Node

Firstly, ensure that DataKeeper-3 is separate from the cluster. With this, you now have a two-node cluster (DataKeeper-1 and DataKeeper-2) with SQL Server configured as a failover cluster instance, but still replicating to the third node, DataKeeper-3, using SIOS DataKeeper.

Navigating a Disaster Recovery Process

So, how would this work in an actual disaster? Here are the steps you would need to follow:

  1. Simulate a Disaster: In this case, to simulate a disaster, we take SQL Server offline on the cluster (DataKeeper 1 and 2).
  2. Switch to DataKeeper 3: With SQL Server offline, we switch over to DataKeeper-3. The volume E on DataKeeper 3, however, is initially not accessible.
  3. Unlock the Volume: To unlock the volume on DataKeeper-3, you would need to execute a command-line operation as shown in the tutorial video called ‘emcmd . switchovervolume’
  4. Attach Databases: In a real disaster, you’ll want to have a standalone instance of SQL Server running on DataKeeper-3. From this standalone instance, you could then attach the user-defined databases.
  5. Replicate Back to the Cluster: Data written on DataKeeper-3 is replicated back to DataKeeper-1 and DataKeeper-2. This can be verified using the SIOS DataKeeper interface.

Post-Disaster Recovery

Once the disaster is resolved, you can switch back the volume to the original source using a similar process.

By leveraging SIOS DataKeeper Cluster Edition, you can implement a robust, cost-effective, and efficient high availability/disaster recovery strategy for your SQL Server environment. This process not only helps save significant costs by eliminating the need for upgrading to SQL Server Enterprise Edition, but it also ensures data availability and a quick recovery during a disaster.

Check out this video for a complete walkthrough of the process and ensure your SQL Server remains resilient, without breaking the bank.

Reproduced with permission from SIOS
Filed Under: Clustering Simplified Tagged With: DataKeeper Cluster Edition, DKCE, SQL Server High Availability

Recent Posts

  • How to Assess if My Network Card Needs Replacement
  • Application Intelligence in Relation to High Availability
  • Transitioning from VMware to Nutanix
  • Are my servers disposable? How High Availability software fits in cloud best practices
  • Data Recovery Strategies for a Disaster-Prone World

Most Popular Posts

Maximise replication performance for Linux Clustering with Fusion-io
Failover Clustering with VMware High Availability
create A 2-Node MySQL Cluster Without Shared Storage
SAP for High Availability Solutions For Linux
Bandwidth To Support Real-Time Replication
The Availability Equation – High Availability Solutions.jpg
Choosing Platforms To Replicate Data - Host-Based Or Storage-Based?
Guide To Connect To An iSCSI Target Using Open-iSCSI Initiator Software
Best Practices to Eliminate SPoF In Cluster Architecture
Step-By-Step How To Configure A Linux Failover Cluster In Microsoft Azure IaaS Without Shared Storage azure sanless
Take Action Before SQL Server 20082008 R2 Support Expires
How To Cluster MaxDB On Windows In The Cloud

Join Our Mailing List

Copyright © 2025 · Enterprise Pro Theme on Genesis Framework · WordPress · Log in