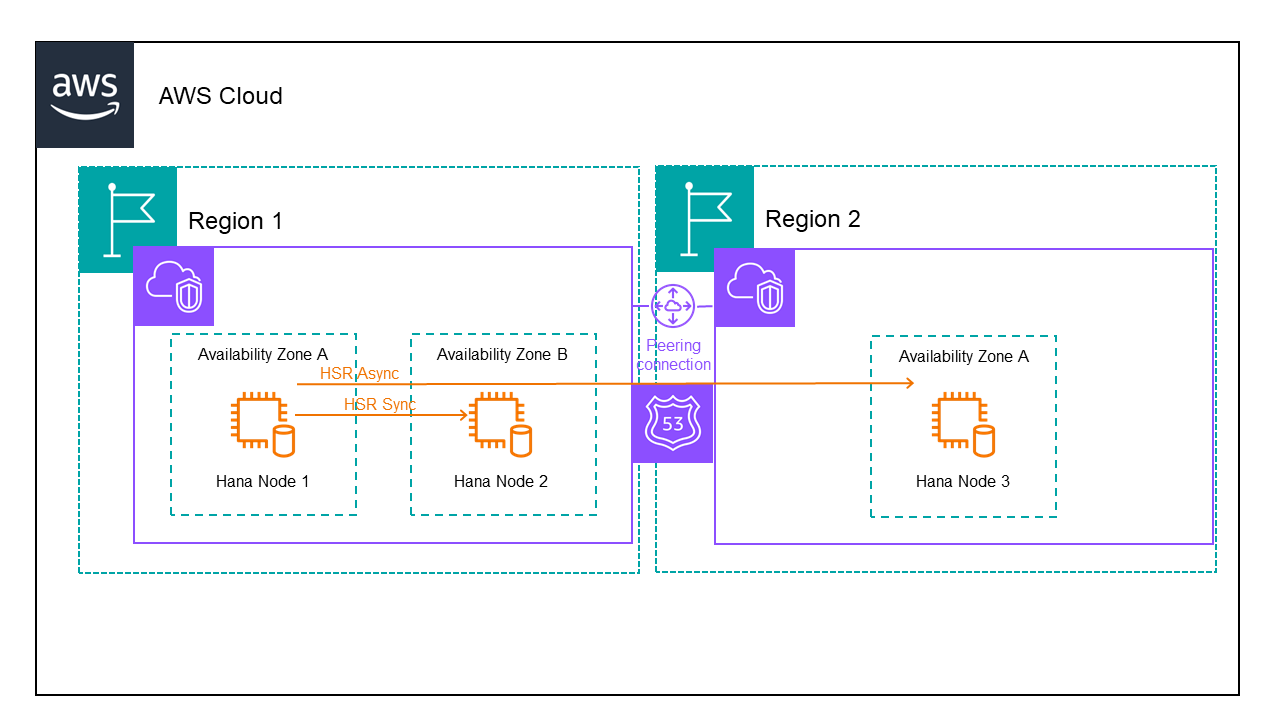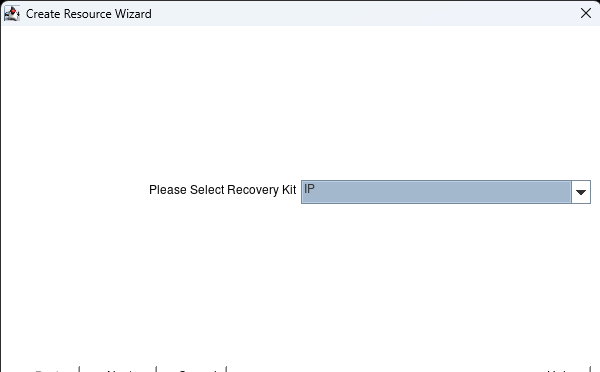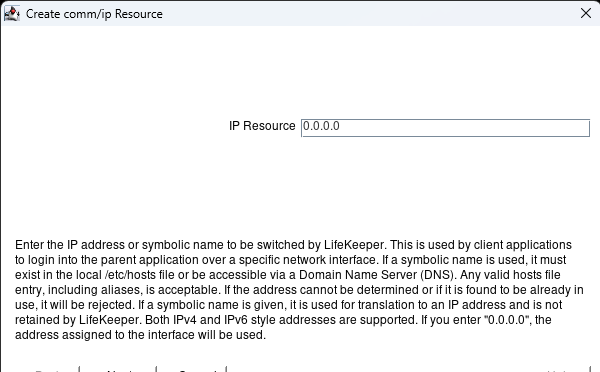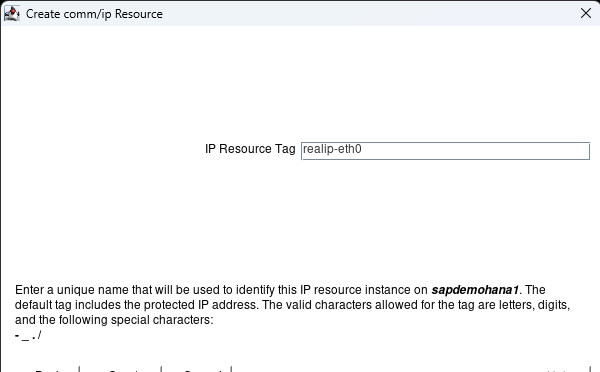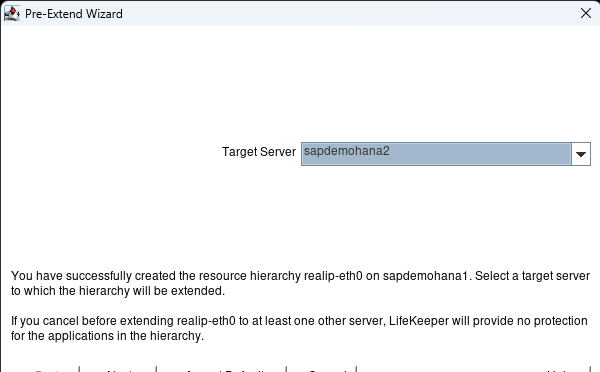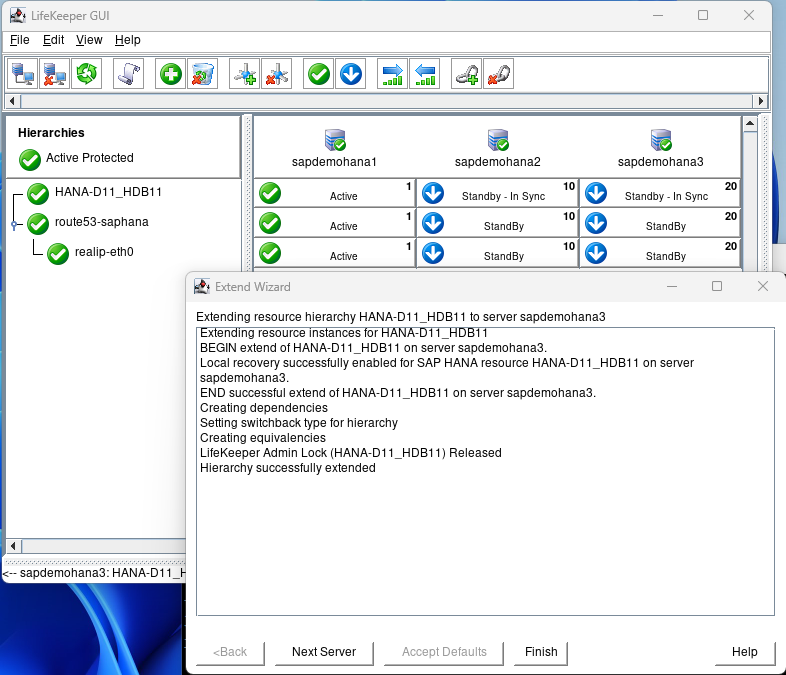
How to Set Up a DataKeeper Cluster Edition (DKCE Cluster)
What is a DKCE cluster?
DKCE is an acronym for DataKeeper Cluster Edition. DKCE is a SIOS software that combines the use of DataKeeper with features of Windows Failover Clustering to provide high availability through migration-based data replication.
The steps to create a DKCE cluster
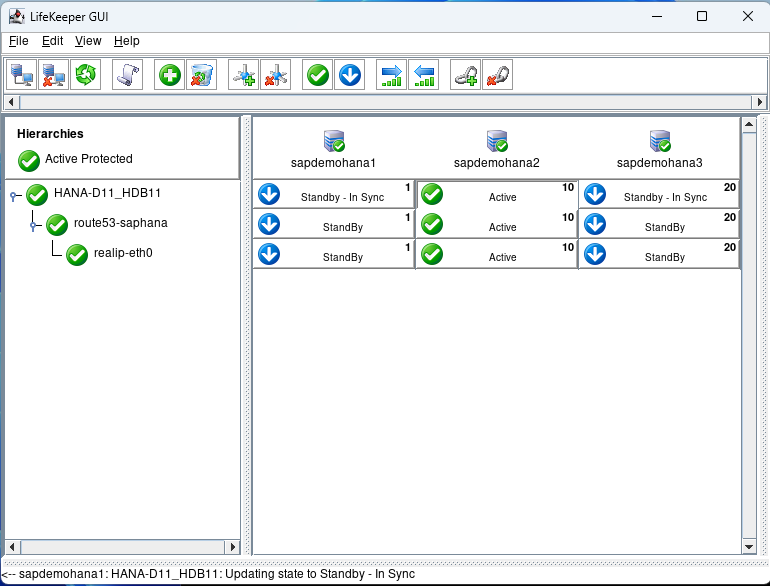
For this example, I will set up a three-node cluster with the third node maintaining node majority.
Step 1: You must have DataKeeper installed on 2/3 of your systems to set up a DKCE cluster. Click on the following link to follow our quick start guide to complete this install: https://docs.us.sios.com/dkce/8.10.0/en/topic/datakeeper-cluster-edition-quick-start-guide
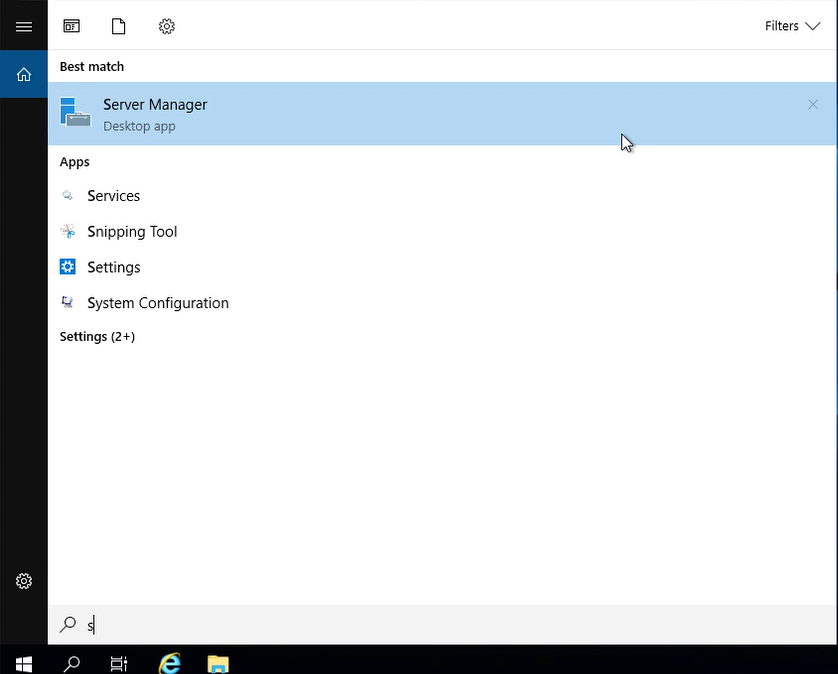
Step 2: Add the servers that you plan on managing in the Server Manager. This will need to be done on all servers you plan on adding to the cluster.
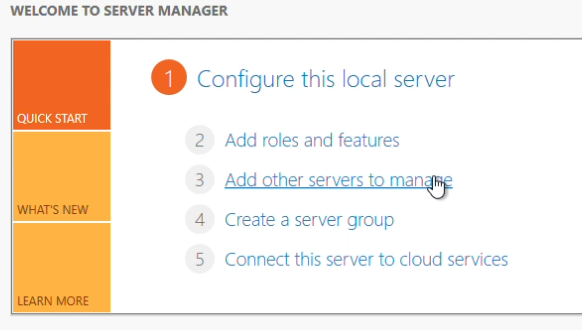
On your server navigate to Server Manager
Click “Add other servers to manage”
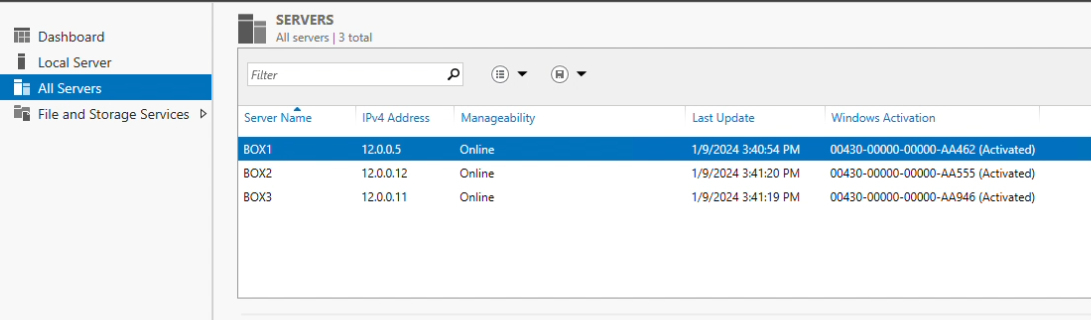
I added the servers by their name here. To do so this way you will need to verify your system name and IP entries in the host file, located here: C:\Windows\System32\drivers\etc\hosts

After all servers have been added, you can verify by navigating to “All servers” in Server Manager
Step 3: You may notice a winRM error, to bypass it run this command in PS as an administrator. Run this command to add servers in your cluster as trusted hosts. This command will need to be run on every system in your cluster.
Set-Item WSMan:\localhost\Client\TrustedHosts -Value ‘<name of server 1>,<name of server 2>’
Step 4: Install Failover Clustering
Follow these steps to install failover clustering.
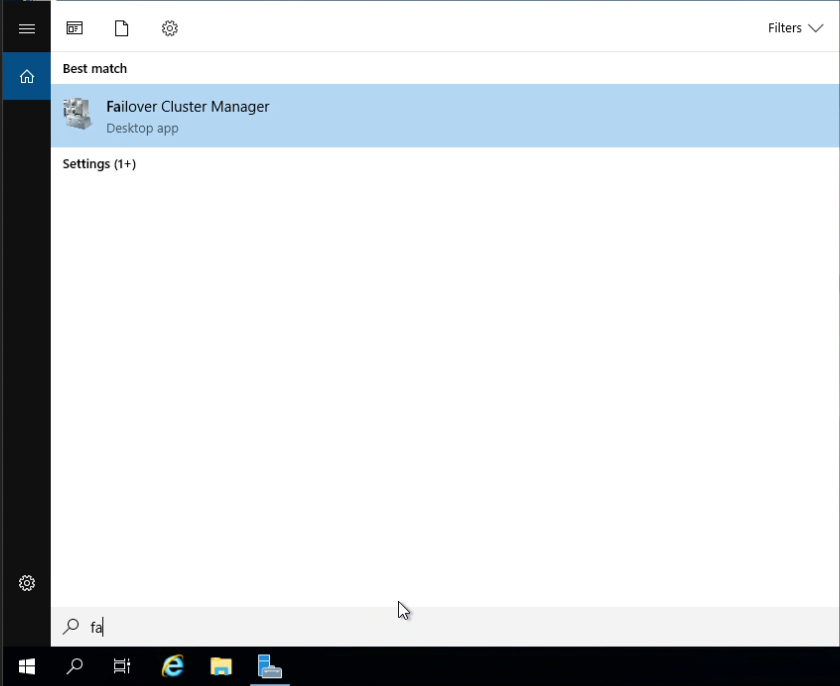
Step 5: Navigate to the Failover Cluster Manager
Step 6: Click “Create Cluster”

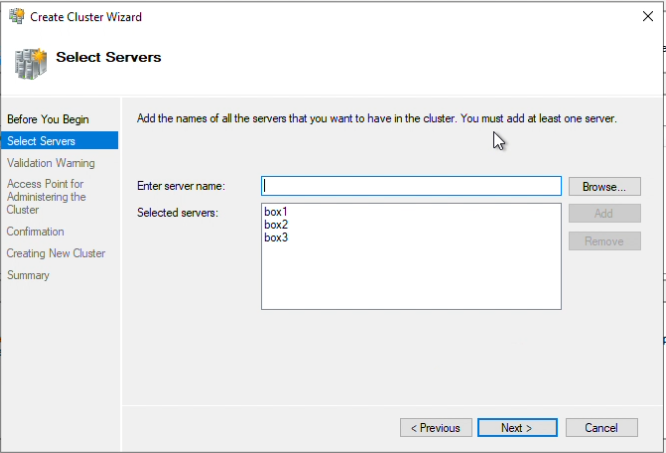
Step 7: Next, add the servers that should be in the cluster and click “Add” after each entry.
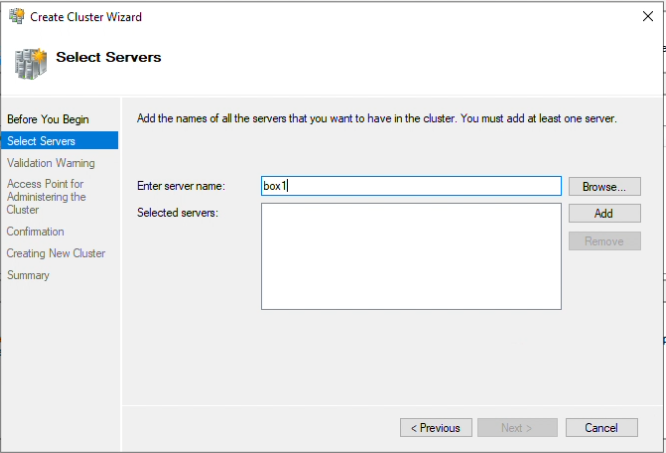
Step 8: The list should be similar to the one in the following image
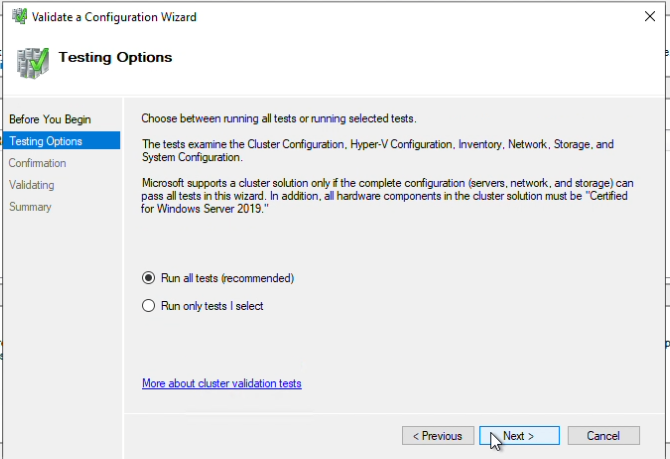
Step 9: Choose “Run all tests” for the validation test, and click Next.
Step 10: Once the tests have been completed, click “Finish”
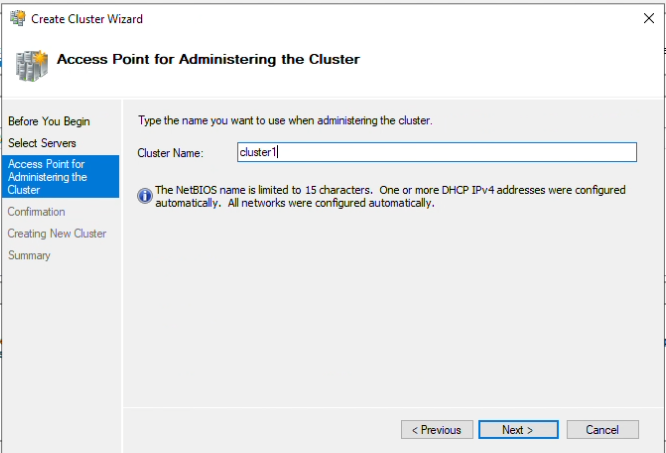
Step 11: Name your cluster, I have named this one “Cluster1”, click “Next”
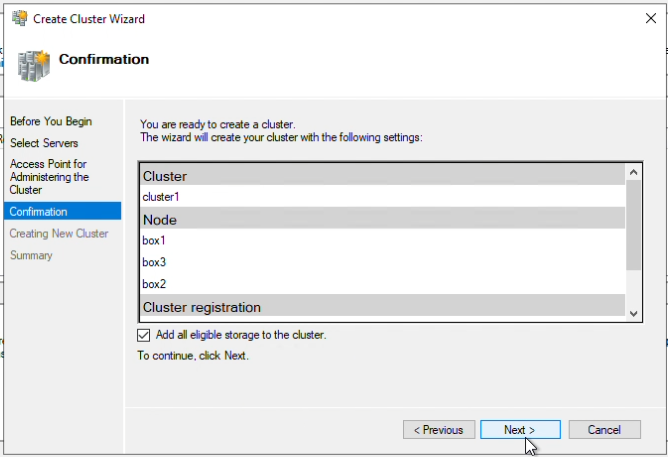
Step 12: Verify “Add all eligible storage to the cluster” is checked, click “Next”
Step 13: Once step 12 is completed, click “Finish”
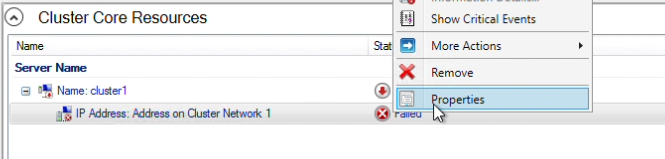
Step 14: In Failover Cluster Manager, the cluster will initially be offline. I will be assigning an unused IP to bring it online. In the “Cluster Core Resources” right-click on the IP address resource and select Properties.
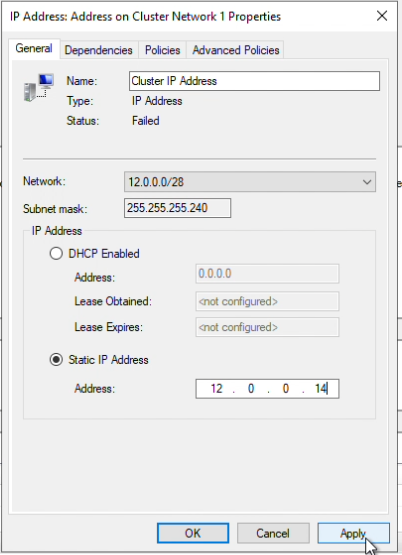
In the properties panel, my subnet mask is /28, therefore I will choose an available IP within the range, 12.0.0.14. Click “Apply”
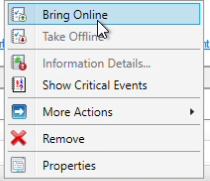
In the “Cluster Core Resources” right-click on the cluster and select “Bring Online”
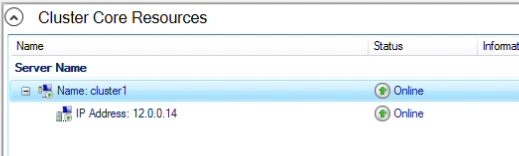
The resources should now be online
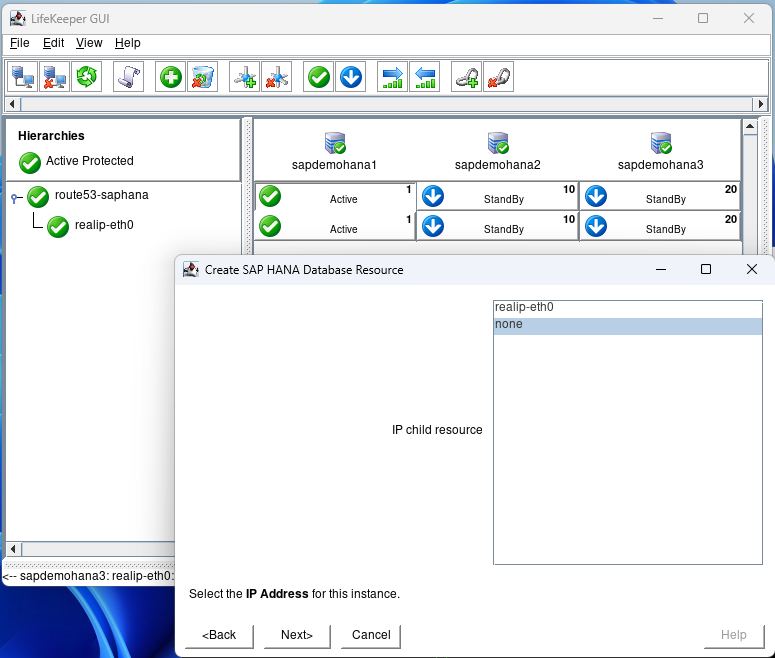
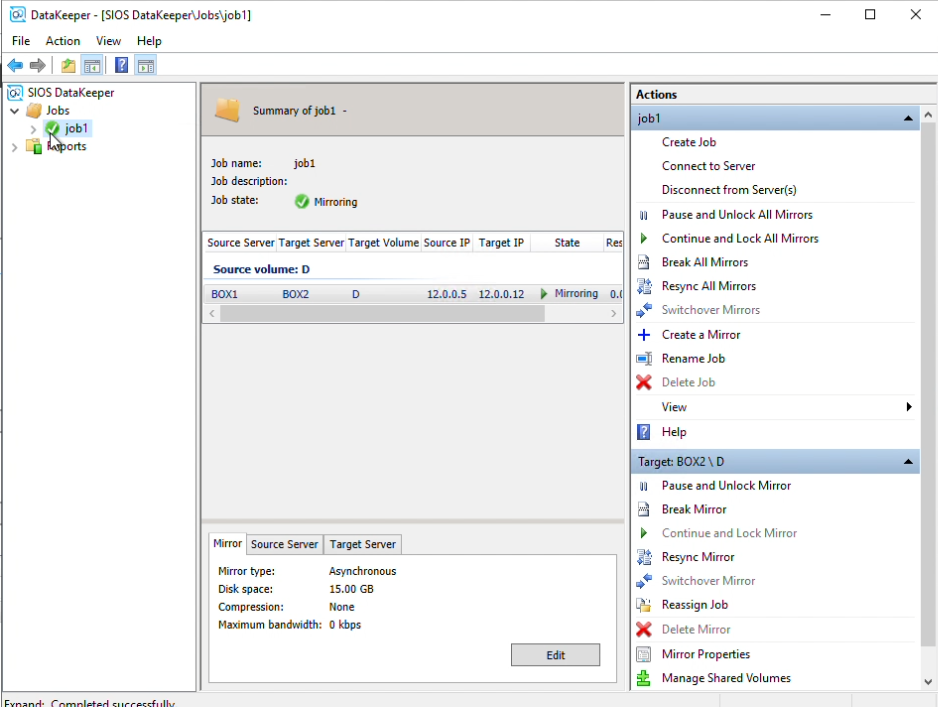
Step 15: Navigate to DataKeeper

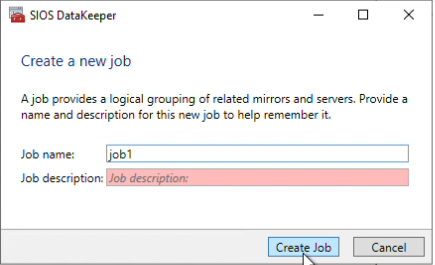
Step 16: Right-click on Job and click “Create Job” to begin creating our first mirror

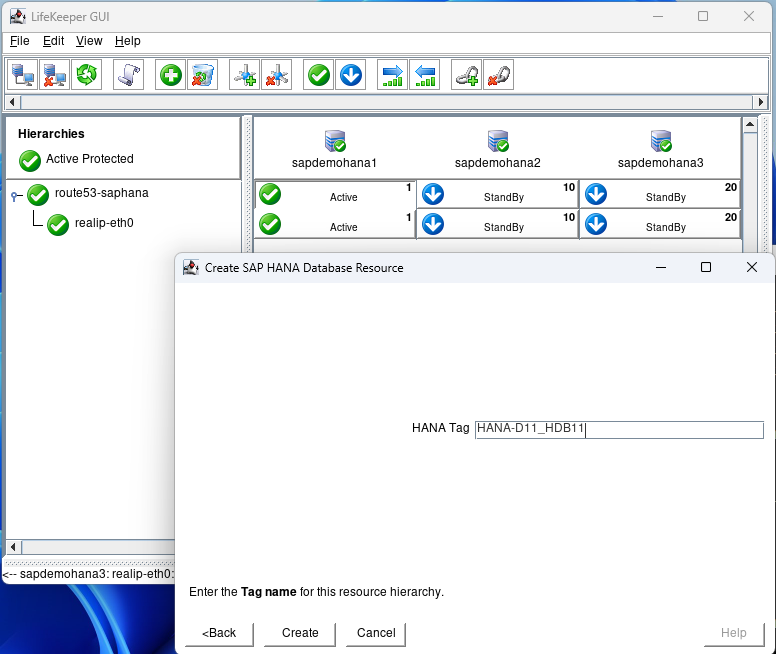
Give the job a name I am naming my job “job1”, and click “Create Job”
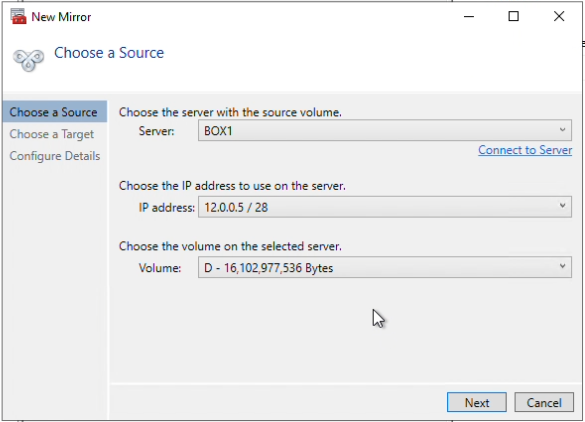
Choose the source and volume to replicate data from. I have chosen Box1 as my source, and volume D, click “Next”
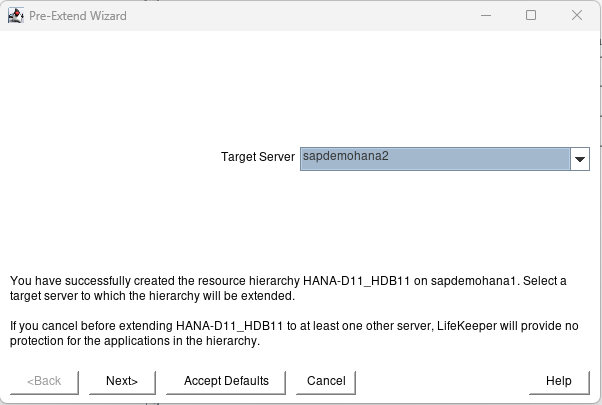
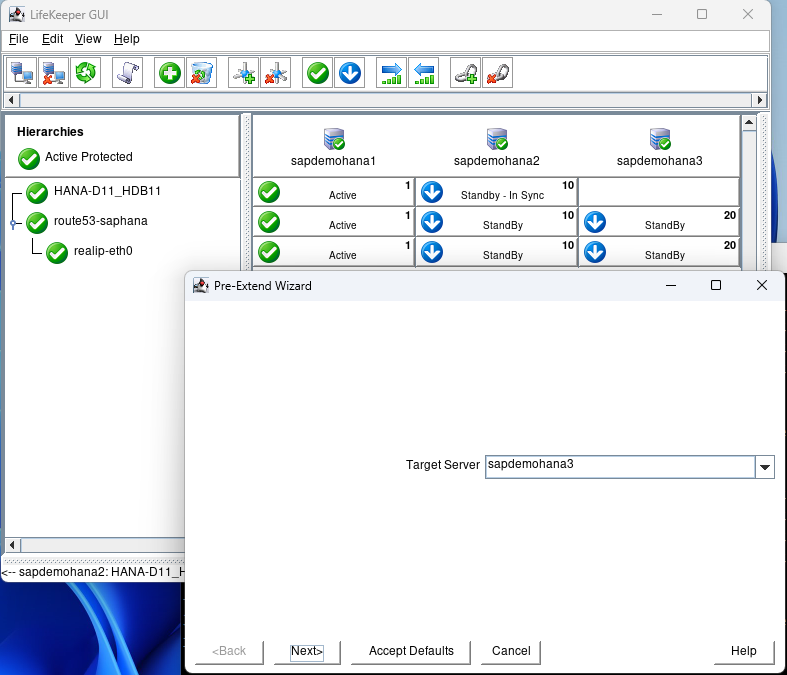
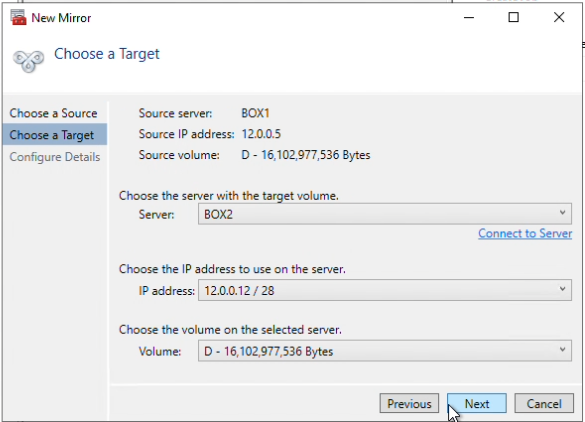
Next, choose a server and a volume to be the target. I have chosen Box2, and volume D.
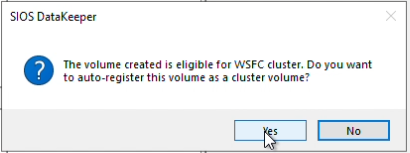
A prompt will appear to ask you to auto-register the volume you have created as a WSFC volume, select “Yes” to make this volume Highly Available.
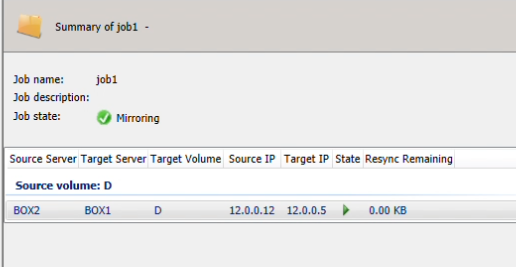
In DataKeeper you can now see that the volume is currently mirroring.
Step 17: In Failover Cluster Manager, navigate to Storage, then Disks. You will see the volume that you have auto-registered is WSFC.

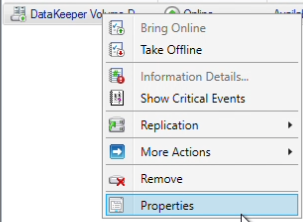
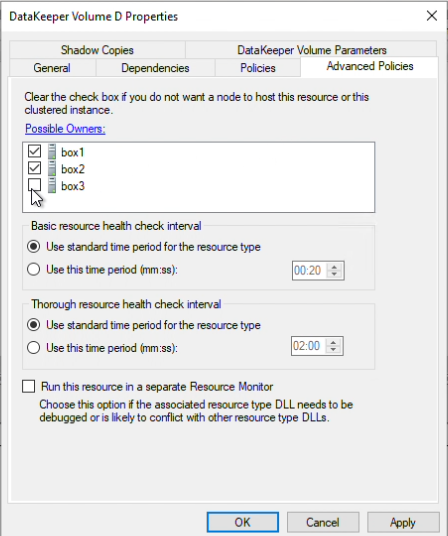
Step 18: Let’s verify the Owners that should be checked. Right-click on the volume, and click “Properties”
Since I need a third to be a witness and maintain node majority, Box3 will need to be unchecked / remain unchecked.
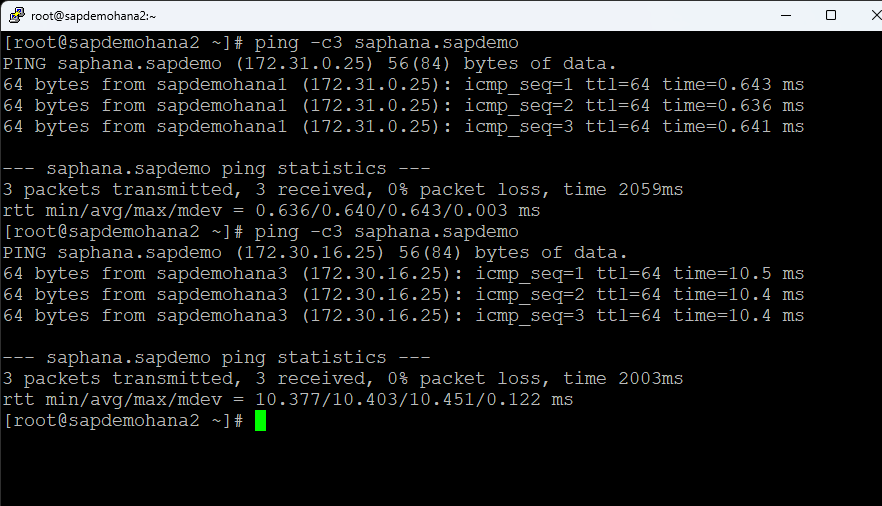
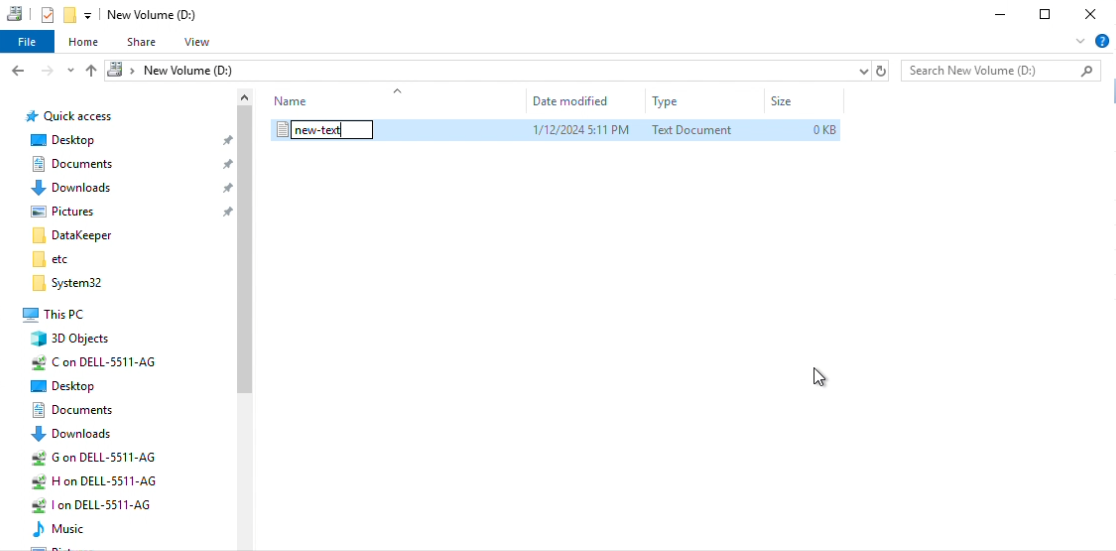
Step 19: Now we can test a migration through Failover Cluster Manager. Navigate to File Explorer and create a new text file in the volume that is currently being mirrored. Do this on your Source.
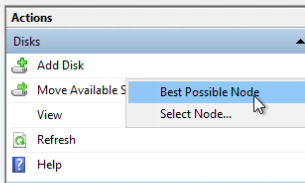
Navigate to Failover Cluster Manager, click “DataKeeper Volume D” and select “Move Available Storage” from the Actions pane.

Right-click “Best Possible Node”. This should automatically migrate to your target.
In Failover Cluster Manager verify the owner of “DataKeeper Volume D” is now the target node

Navigate to DataKeeper to verify that your target is now the Source, and vice versa.
Successful DKCE Cluster Setup
You have completed the setup of a DKCE cluster.


SIOS provides resources and training for all our products.
Reproduced with permission from SIOS