SIOS SANless clusters

SIOS SANless clusters High-availability Machine Learning monitoring

  • Home
  • Products
    • SIOS DataKeeper for Windows
    • SIOS Protection Suite for Linux
  • News and Events
  • Clustering Simplified
  • Success Stories
  • Contact Us
  • English
  • 中文 (中国)
  • 中文 (台灣)
  • 한국어
  • Bahasa Indonesia
  • ไทย

How to recreate the file system and mirror resources to ensure the size information is correct

November 11, 2022 by Jason Aw Leave a Comment

How to recreate the file system and mirror resources to ensure the size information is correct

When working with high availability (HA) clustering, it’s essential to ensure that the configuration of all nodes in the cluster are parallel with one another. These ‘mirrored’ configurations help to minimize the failure points on the cluster, providing a higher standard of HA protection. For example, we have seen situations in which the mirror-size was updated on the source node but the same information was not updated on the target node. The mirror size mismatch prevented LifeKeeper from starting on the target node in a failover. Below are the recommended steps for recreating the mirror resource on the target node with the same size information as the source:

Steps:

  1. Verify – from the application’s perspective – that the data on the source node is valid and consistent
  2. Backup the file system on the source (which is the source of the mirror)
  3. Run /opt/LifeKeeper/bin/lkbackup -c to backup the LifeKeeper config on both nodes
  4. Take all resources out of service.  In our example the resources are in service on node sc05 and sc05 is the source of the mirror (and sc06 is the target system/target of the mirror).
    1. In the right pane of the LifeKeeper GUI, right-click on the DataKeeper resource that is in service.
    2. Click Out of Service from the resource popup menu.
    3. A dialog box will confirm that the selected resource is to be taken out of service. Any resource dependencies associated with the action are noted in the dialog. Click Next.
    4. An information box appears showing the results of the resource being taken out of service. Click Done.
  1. Verify that all resources are out of service and file systems are unmounted
    1. Use the command cat /proc/mdstat on the source to verify that no mirror is configured
  1. Use the mount command on the source to make sure the file system is no longer mounted
  2. Use /opt/LifeKeeper/bin/lcdstatus -q  on the source to make sure the resources are all OSU.
  1. In the LifeKeeper GUI break the dependency between the IP resource (VIP) and the file system resource (/mnt/sps).  Right click on the VIP resource and select Delete Dependency.

Then, select the File System resource (/mnt/sps) for the Child Resource Tag.

This will result in two hierarchies, one with the IP resource (VIP) and one with the file system resource (/mnt/fs) and the mirror resource (datarep-sps).

  1. Delete the hierarchy with the file system and mirror resources. Right click on /mnt/sps and select Delete Resource Hierarchy.
  1. On the source, perform ‘mount <device> <directory>’ on the file system.

Example: mount /dev/sdb1 /mnt/sps

  1. Via the GUI recreate the mirror and file systems via the following:
    1. Recovery Kit: Data Replication
  1. Switchback Type: Intelligent
  2. Server: The source node
  3. Hierarchy Type: Replicate Existing Filesystem
  4. Existing Mount Point: <select your mount point>. It is /mnt/sps for this example.
  5. Data Replication Resource Tag: <Take the default>
  6. File System Resource Tag: <Take the default>
  7. Bitmap File: <Take the default>
  8. Enable Asynchronous Replication: Yes
  1. Once created, you can Extend the mirror and file system hierarchy:
    1. Target server: Target node
    2. Switchback Type: Intelligent
    3. Template Priority: 1
    4. Target Priority: 10
  1. Once the pre-extend checks complete select next followed by these values:
    1. Target disk: <Select the target disk for the mirror>.  It is /dev/sdb1 in our example.
    2. Data Replication Resource Tag: <Take the default>
    3. Bitmap File: <Take the default>
    4. Replication Path: <Select the replication path in your environment>
    5. Mount Point: <Select the mount point in your environment>.  It is /mnt/sps in our example.
    6. Root Tag: <Take the default>

When the resource “extend” is done select “Finish” and then “Done”.

  1.  In the LifeKeeper GUI recreate the dependency between the IP resource (VIP) and the file system resource (/mnt/sps). Right click on the VIP resource and select Create Dependency.  Select /mnt/sps for the Child Resource Tag.
  1. At this point the mirror should be performing a full resync of the size of the file system. In the LifeKeeper GUI in the right pane of the LifeKeeper GUI, right-click on the VIP resource. Select “In Service” to restore the IP resource (VIP), select the source system where the mirror is in service (sc05 in our example)  and verify that the application restarts and the IP is accessible.

Reproduced with permission from SIOS

Filed Under: Clustering Simplified Tagged With: High Availability, SIOS LifeKeeper

Explaining the Subtle but Critical Difference Between Switchover, Failover, and Recovery

November 9, 2022 by Jason Aw Leave a Comment

Explaining the Subtle but Critical Difference Between Switchover, Failover, and Recovery

High availability is a speciality and like most specialities, it has its own vocabulary and terminology. Our customers are typically very knowledgeable about IT but if they haven’t been working in an HA environment, some of our common HA terminology can cause a fair amount of confusion – for them and for us. They are simple-sounding but with very specific meaning in the context of HA.Three of these terms are discussed here – swithover, failover, and recovery.

What is a Switchover?

A switchover is a user-initiated action via the high availability (HA) clustering solution user interface or CLI. In a switchover, the user manually initiates the action to change the source or primary server for the protected application. In a typical switchover scenario, all running applications and dependencies are stopped in an orderly fashion, beginning with the parent application and concluding when all of the child/dependencies are stopped. Once the applications and their dependencies are stopped, they are then restarted in an orderly fashion on the newly designated primary or source server.

For example, if you have resources Alpha, Beta, and Gamma. Resource Alpha depends on resources Beta and Gamma. Resource Beta depends on resource Gamma.  In a switchover event, resource Alpha is stopped first, followed by Beta, and then finally Gamma.  Once all three are stopped, the switchover continues to bring the resources into an operational state on the intended server.  The process starts with resource Gamma, followed by Beta, and then finally the start up operations complete for resource Alpha. 

Traditionally, a switchover operation requires more time as resources must be stopped in a graceful and orderly manner. A switchover is often performed when there is a need to update software versions while maintaining uptime, performing maintenance work (via rolling upgrades) on the primary production node, or doing DR testing.

Key Takeaway: If there was no failure to cause the action, then it was a switchover

What is a Failover?

A failover operation is typically a non-user initiated action in response to a server crash or unexpected/unplanned reboot. Consider the scenario of an HA cluster with two nodes, Node A and Node B.  In this scenario, all critical applications Alpha, Beta, and Gamma are started and operational on Node A. In this scenario, a failover is what takes place when Node A experiences an unexpected/unplanned reboot, power-off, halt, or panic. Once the HA software detects that Node A is no longer functioning and operationally available within the cluster (as defined by the solution), it will trigger a failover operation to restore access of the critical applications, resources, services and dependencies on the available cluster node, Node B in this case.  In a failover scenario, because Node A has experienced a crash (or other simulated immediate failure) there are no processes to stop on Node A, and consequently once proper detection and fencing actions have been processed, Node B will immediately begin the process of restoring resources. As in the switchover case, the process starts with resource Gamma, followed by Beta, and then finally the start up operations complete for resource Alpha. Traditionally, a failover operation requires less time than a switchover. This is because the processing of a failover does not require any resources to be stopped (or quiesced) on the previous primary (in-service or active) node.

Key Takeaway: A failover occurs in response to a system failure.

What is Recovery?

A recovery event is easy to confuse with a failover. A recovery event occurs when a process, server, communication path, disk, or even cluster resource fails and the high availability software operates in response to the identified failure. Most HA software solutions are capable of multiple ways of handling a recovery event. The most prominent methods include:

  1. Graceful restart locally, then a graceful restart on the remote
    1. A restart is always attempted locally, if recovery is successful no further action occurs. If a local restart fails the next operation occurs
    2. If a local restart fails, resources are gracefully moved to the remote node
  2. Graceful restart locally, then a forced restart on the remote
    1. A restart is always attempted locally, if recovery is successful no further action occurs.  If a local restart fails the next operation occurs.
    2. Resources are moved to the remote node by fencing the primary node
  3. Forced restart on the remote
    1. A restart is never attempted locally
    2. Resources are always forced to the next available cluster node as described in method 2b.
  4. Forced server restart, no remote failover
    1. A restart is always attempted locally
    2. If a local restart fails, the primary node is restarted to attempt to recover services.
    3. Resources will not fail to a remote system
  5. Policy based local restart, then remote
    1. Policies may govern the number of retries before a remote attempt a recovery occurs

Due to the number of variations in recovery policy it is easy to see a recovery event that resembles the behavior of a switchover. This is often the case in methods 1 and 5. In these scenarios applications and services are gracefully stopped in an orderly fashion before being started on the remote node. Methods 2 and 3, customers will often see a behavior similar to a failover. In methods 2 and 3, the primary server is restarted or fenced by the HA software which creates an observable behavior similar to a failover.  Method 4 is typically an option that is rarely used, but is a hybrid of both a switchover and a failover.  Method 4 begins with a graceful stop of the applications and services, followed by a restart of the applications and services (much like a switchover). However, if the local restart of the applications and services fails, the system will be restarted (much like a failover), but without actually failing to the remote cluster node. While rare, Method 4 is often invoked in cases where an unbalanced cluster is present, or used with a policy based methodology.

Key Takeaway: A recovery event depends on the method chosen

HA terminology between vendors is an area where common terms can take on different meanings. As you deploy and maintain your cluster solution with enterprise applications, be sure that you understand the solution provider terms for failover, switchover and recovery.  And, while you are at it, make sure you know whether the restaurant will put the sauce on the side (in a saucer), or on the side (your mashed potatoes)

Reproduced with permission from SIOS

Filed Under: Clustering Simplified Tagged With: disaster recovery, failover clustering, High Availability

Best Practices for Downloading SAP Products

November 3, 2022 by Jason Aw Leave a Comment

Best Practices for Downloading SAP Products

This blog is an attempt to demystify some of the steps required to download SAP and related applications and patches, as it can be complicated to the inexperienced user. An SAP Support login will be required before you can proceed with the steps outlined below..

It’s a good idea to download and install the “SAP Download Manager” which is found on the bottom of the page below. The Download Manager allows you to select multiple packages to be downloaded at the same time.This allows unattended download of multiple packages.

Follow this link for SAP instructions on how to install and configure the software download manager.

Once you download and execute the DLManager.jar, you will be prompted with the configuration assistant:

Click Next

Enter your SAP login credentials, if you need a proxy then you can configure it.

Enter the location where downloads will be saved. Click Finish.

Now the Download Manager is running and you will add files into the basket to download them, see below.

Click the Double green >> arrow to download all items in the download manager.

Installations & Upgrades

Scroll to the top of software downloads:

What we’re interested in here is primarily “Installations and Upgrades”. This is where complete SAP version images are available.

For HANA scroll to H

For Hana I select “H” and then find “SAP HANA Platform Edition 2.0”.

Lots of HANA, Find and select “SAP HANA PLATFORM EDITION”

Clicking on this gives me the option to select “Installation”.

Now we are presented with a list of available current software releases, for HANA it’s currently either version 2.0 SP5 or SP6. You need to select the hardware platform you want, in our case Linux x86_64.

If we wanted to use the download manager we would simply click the shopping cart (circled red), or we can download directly through our browser by clicking the link (circled green).

HANA comes in the form of a ZIP that needs to be uploaded to your Linux VM and then unpacked using unzip. Most of the SAP packages come in .SAR format and this requires SAPCAR to extract, SAPCAR is the SAP utility that’s used to compress or uncompress files.

You can search for SAPCAR and download the version appropriate for your platform, SAPCAR is typically used with -xvf options e.g. ./SAPCAR -xvf SAP.SAR

Support Packages & Patches

“Support Packages and Patches” would get you certain patch levels that can be applied to base product levels. “Databases” is used to support a third party database for use with SAP (other than HANA).

Once we select “Support Packages and Patches” we are presented with several options on how we want to locate software. I normally use “By Alphabetical Index (A-Z)”.

H for SAP HANA

Then the software component you want to patch, e.g SAP HANA PLATFORM EDITION

Again, select which subcomponent you want to patch, e.g. SAP HANA PLATFORM EDITION 2.0

Finally, choose the exact patch level you want for that selected subcomponent.

Finally, you are ready for the fun part…installing SAP! If you need help with ensuring your SAP infrastructure is highly available, please reach out to SIOS. We would be glad to speak with you.

Reproduced with permission from SIOS

Filed Under: Clustering Simplified Tagged With: SAP

Installing SAP MaxDB in an HA Environment

November 1, 2022 by Jason Aw Leave a Comment

Installing SAP MaxDB in an HA Environment

General SAP documentation on MaxDB is here: https://maxdb.sap.com/documentation/

MaxDB is a relational database management system (RDBMS) sold by SAP for large environments (SAP and non-SAP) that require enterprise-level database functionality. The first step to delivering high availability for any application is ensuring it is installed according to best practices. This blog provides important insight for installing MaxDB in a SIOS LIfeKeeper for Linux high availability clustering environment. It includes links to detailed installation documentation provided by SAP.

These instructions assume that you will perform the MaxDB installation steps on all nodes in your SIOS LifeKeeper cluster that will be “production” nodes.

1. Downloading the MaxDB software

  • Use your SAP account to download latest MaxDB package, in my case 51054410_2
  • Upload the package to your Linux instance, in this case to /mnt/software/ and extract the file using  SAPCAR with switches -xvf.
  • cd into the “MaxDB_7.9___SP10_Build_05_” folder and then into “DATA_UNITS” and then finally “MAXDB_LINUX_X86_64”
  • SAP document describing installation: https://maxdb.sap.com/doc/7_7/44/eb166db6f0108ee10000000a11466f/content.htm

2. Using the CLI Installer

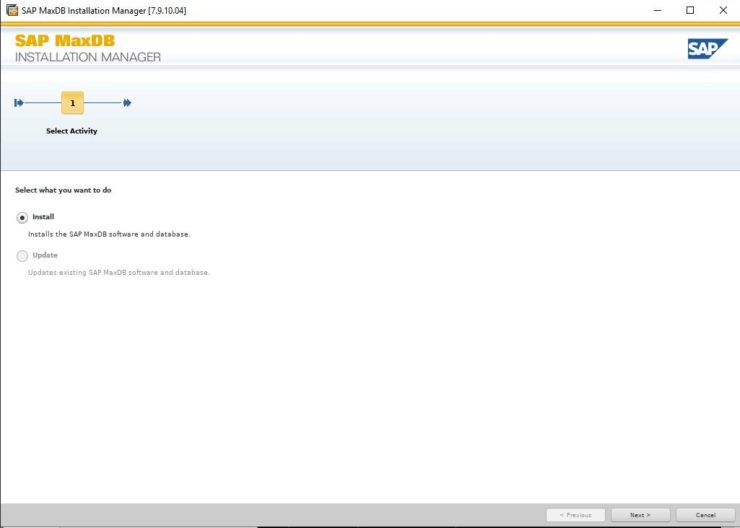
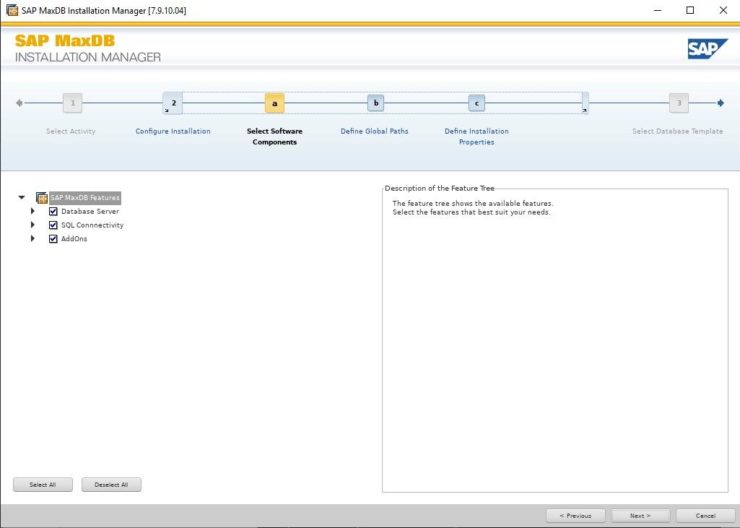
Run SDBINST,  the MaxDB installation manager which will begin the installation process.

Walk through the options, either specify the values or accept the defaults:

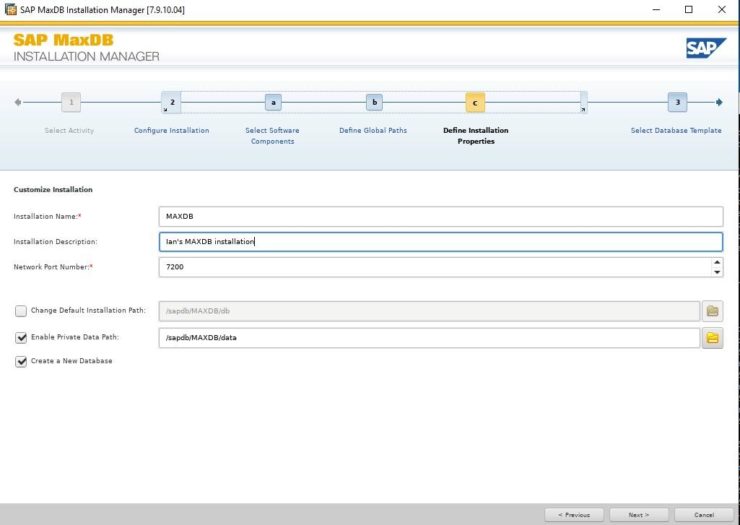
Select 0 for all components. You will then be prompted for the installation name. Installation path, installation description, privatedata and a port number.

This installations instance data location will be  privatedata and the port number is the port that this instance will use while running, the default is 7200 for the first installation.

If you need to uninstall, follow the steps in this SAP document: https://maxdb.sap.com/doc/7_8/44/d8fc93daba5705e10000000a1553f6/content.htm

3. GUI Installer

To use the GUI installer, you will need to set up xauth and use xming (or similar X-Windows emulator), see https://superuser.com/questions/592185/how-do-i-get-x11-forwarding-to-work-on-windows-with-putty-and-xming

Note that the graphics libraries may need to be fixed. Fix some library links, Newer Linux versions have newer graphics libraries with different names. We can still use the newer libraries but MaxDB expects the older names and so we will create symbolic links to these existing libraries with the names that MaxDB expects to find:

ln /usr/lib64/libpangoxft-1.0.so.0 /usr/lib64/libpangox-1.0.so.0

ln /usr/lib64/libpng12.so.0 /usr/lib64/libpng.so.3

ln /usr/lib64/libtiff.so.5 /usr/lib64/libtiff.so.3

Now run setup:

cd /mnt/software/MaxDB_7.9___SP10_Build_05_/DATA_UNITS/MAXDB_LINUX_X86_64/

.//SDBSETUP

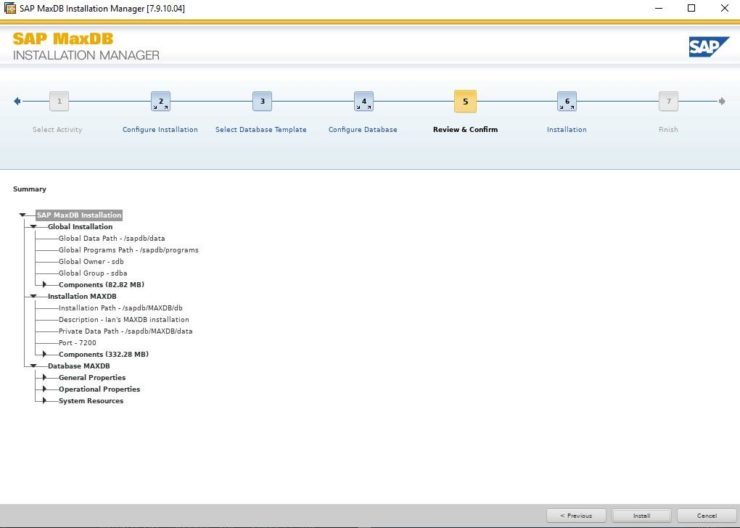
These templates simply pre-define parameters for the MaxDB that will be created as part of the installation. I used Desktop PC/Laptop simply because it’s aimed at small single user installations, You can change most of the parameters after installation completes. See this note for more details.

By default the global owner user created while setting up MaxDB gets /bin/false added to its entry in /etc/passwd  This addition is to restrict the account used for the MaxDB installation for security reasons e.g. you cannot login with this account. In our case we will use this user and we can change the entry in /etc/passwd to /etc/bash so that we can login and use the user that’s created for us in our example.

4. Setting up a database

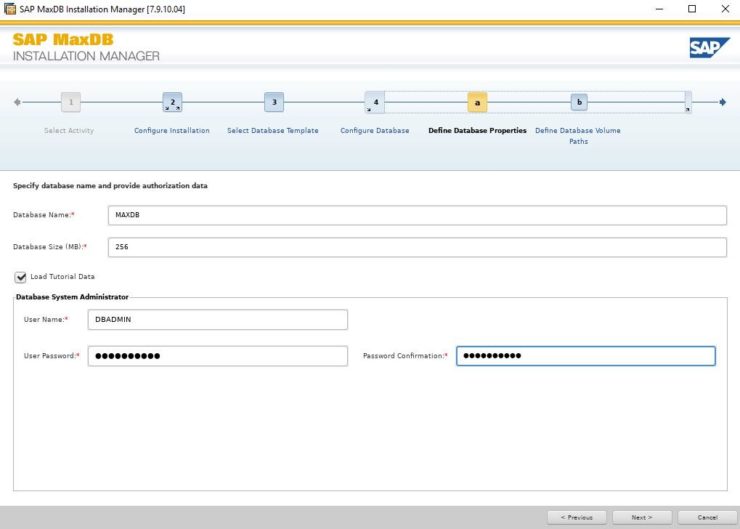
Once we have the actual MaxDB software installed, we need to create a database and then start that database. In this example I will call my database SPS and the default admin user will be dbm with the password dbm.

sudo su – sdb

dbmcli -s -R  /sapdb/MAXDB/db db_create SPS dbm,dbm

dbmcli -d SPS -u dbm,dbm

user_put dbm PASSWORD=dbadmin

This should drop you to a prompt like this “dbmcli on SPS>”, this means that you are connected to the SPS db as sdb and we will now configure some parameters required to run the database.

param_startsession

param_init OLTP

param_put CAT_CACHE_SUPPLY 5000

param_put CACHE_SIZE 3000

param_put MAXDATAVOLUMES 5

param_put RUNDIRECTORYPATH /sapdb/MAXDB/run

param_checkall

param_commitsession

param_addvolume 1 DATA /sapdb/MAXDB/data/DISKD0001 F 2560

param_addvolume 1 LOG  /sapdb/MAXDB/log/DISKL001  F 2048

quit

Now it’s time to start the DB:

dbmcli -d SPS -u dbm,dbadmin db_start

All the above param and dbmcli commands should output OK when you execute them. If they do not then generally they will give you a vague idea of what’s wrong.

dbmcli -d SPS -u dbm,dbadmin

util_connect dbm,dbadmin

db_activate dba,dba

dbmcli -d SPS -u dbm,dbadmin load_systab -u dba,dba -ud domain

dbmcli -d SPS -u dbm,dbadmin

sql_connect dba,dba

sql_execute CREATE USER test PASSWORD test DBA NOT EXCLUSIVE

medium_put data datasave FILE DATA 0 8 YES

medium_put auto autosave FILE AUTO

util_connect dbm,dbadmin

backup_save data

autosave_on

Load_tutorial

auto_extend on

quit

Ok, now we need to create a DEFAULT key to allow SPS-L to connect to the resource, this is done as follows:

xuser -U sdb -d SPS -u dbm,dbadmin, make sure this is executed on all production nodes or make sure that you copy /home/sdb/.XUSER.62 to all production nodes.

Once we have these items complete we can start the global DB listener using:

/sapdb/programs/bin/sdbgloballistener start

Once the global DB listener is running you should be able to connect to the DB using something like MaxDB Studio or SQL.

Filed Under: Clustering Simplified Tagged With: Linux, MaxDB, SIOS LifeKeeper

How to Install SybaselIQ (16.1)

October 27, 2022 by Jason Aw Leave a Comment

How to Install SybaselIQ (16.1)

I created a partition on an attached drive to use as a place to extract and execute software installers, mounted on /mnt/software

This document is a useful reference to use during the installation and configuration processes. Pay particular attention to the required support packages.

Step 1: System Prep

For this installation I used a second 500GB drive attached to the instance. I created the following partitions:

Disk /dev/xvdf: 500 GiB, 536870912000 bytes, 1048576000 sectors

Units: sectors of 1 * 512 = 512 bytes

Sector size (logical/physical): 512 bytes / 512 bytes

I/O size (minimum/optimal): 512 bytes / 512 bytes

Disklabel type: gpt

Disk identifier: 691F3320-5AEE-CF43-802B-A121C0A27B7B

Device         Start   End   Sectors  Size Type

/dev/xvdf1      2048 419432447 419430400  200G Linux filesystem

/dev/xvdf2 419432448 524290047 104857600   50G Linux filesystem

/dev/xvdf3 524290048 528484351   4194304    2G Linux filesystem

I created XFS filesystems on each of these partitions.

I mounted the disks:

/dev/xvdf1 to /mnt/software – 200GB of space to hold installation media etc

/dev/xvdf2 to /opt/sybaseiq – 50GB to hold the Sybase IQ installation, this can be smaller e.g. 5GB

/dev/xvdf3 to /opt/demodb – 2GB to hold the Sybase demo database

The demo database requires csh and ksh to run the install script. You should install these as root with the command “yum install csh” and “yum install ksh”. This is for RHEL, other Linux distributions have different package installers, replace yum with whichever package installer is available.

Step 2: Download Sybase IQ

Download the Sybase install packages from SAP

Copy the SybaseIQ rar files into /mnt/software

Step 3: Install unrar

Install the RAR/UNRAR tools, this is required to extract the RAR files that SAP so likes to use

  • For RHEL, grab the package
    • cd /mnt/software/
    • wget https://www.rarlab.com/rar/rarlinux-x64-5.6.1.tar.gz
    • tar -zxvf rarlinux-x64-5.6.1.tar.gz
    • cd rar
    • cp -v rar unrar /usr/local/bin

Unrar the SybaseIQ installer into /mnt/software/Sybase

  • /usr/local/bin/unrar x 51052038_part1.exe /mnt/software/Sybase

Step 4: Create Sybase Admin User

Sybase recommends not installing IQ as root. Thus I created a new user called sapiq

  • “useradd -g 4 -b /home -u 1500 sapiq”, group 4 on my system was the adm group
  • “passwd sapiq”, change the password for the new sapiq user
  • Edit /home/sapiq/.bashrc, add source “/opt/sybaseiq/SYBASE.sh” to this file and add /opt/sybaseiq/IQ-16_1/bin64/ to the PATH variable
  • Edit /home/sapiq/.bash_profile, add source “/opt/sybaseiq/SYBASE.sh” to this file

Step 5: Create location for SybaseIQ

I created a second partition on the attached drive from above, Sybase IQ is <2GB – I made my drive 5GB just to be on the safe side. Mount this to your preferred location, I used /opt/sybaseiq

  • “sudo chown sapiq.adm /opt/sybaseiq”, make sure that the sapiq user owns the installation directory

Step 6: Running SybaseIQ Setup

cd /mnt/software/Sybase/51052038/Sybase IQ Server 16.1/Linux on IA64 64bit/

./setup.bin

If you have your X-Windows display setup correctly this will automatically launch a GUI installer, if setup.bin doesn’t find an expected X-Display method then it will drop back to an interactive CLI installer.

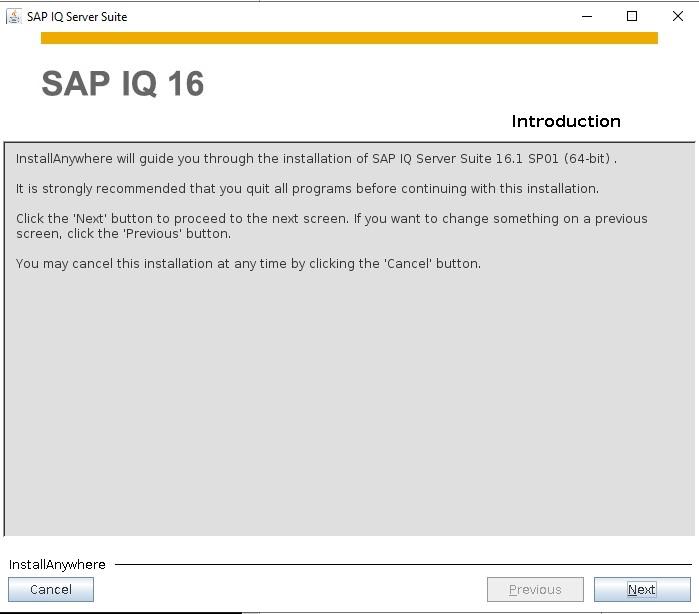
Introduction splash screen, simply select Next.

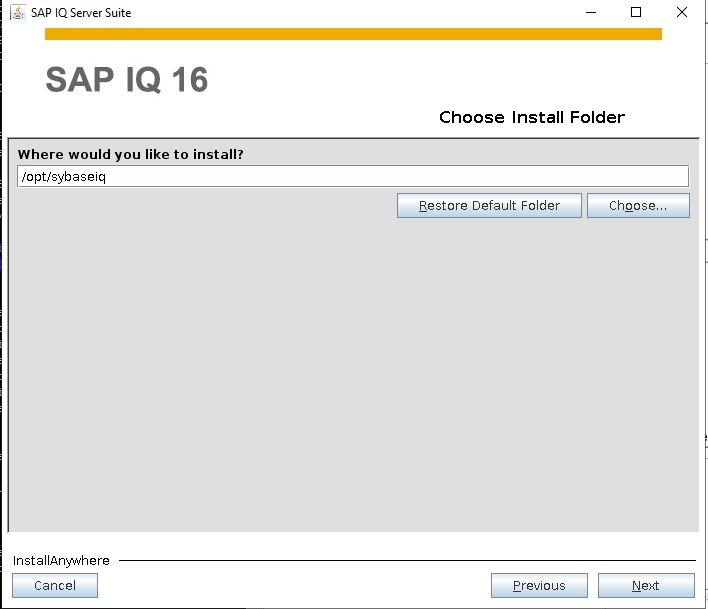
This is the installation location, you can use the “choose” option to navigate to a folder or simply type in a path.

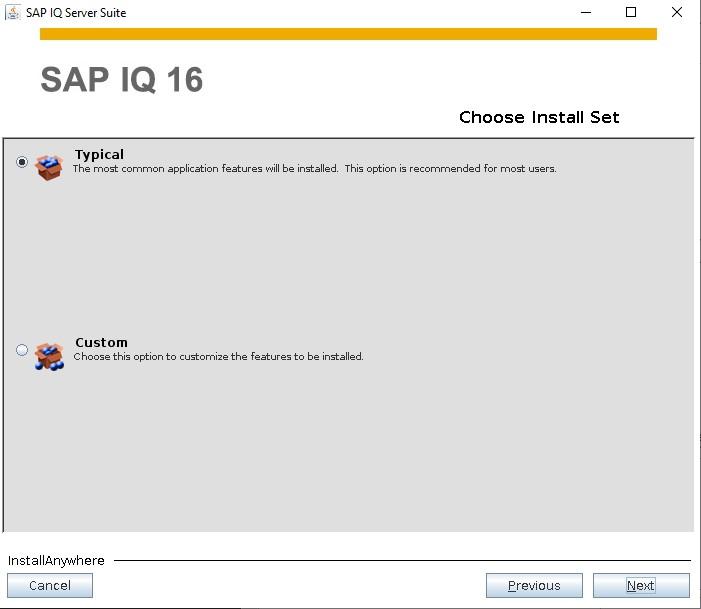
I chose typical here, but if you have specific packages you want to omit or include then you may want to choose Custom.

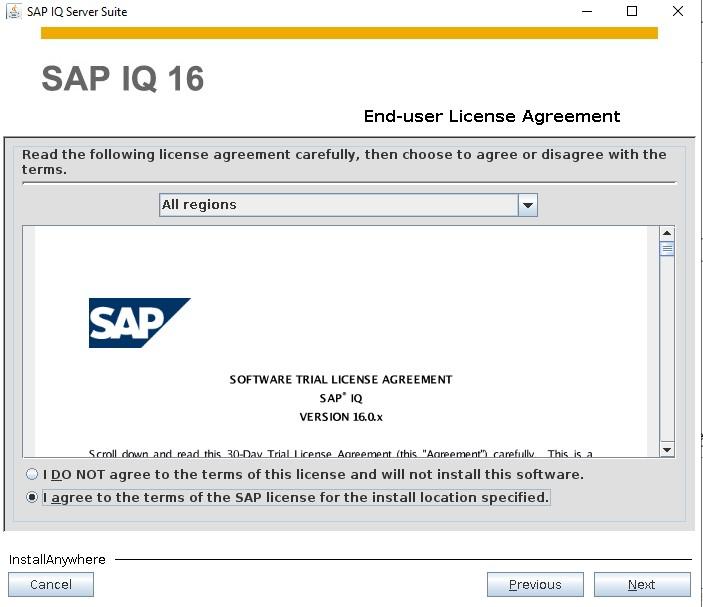
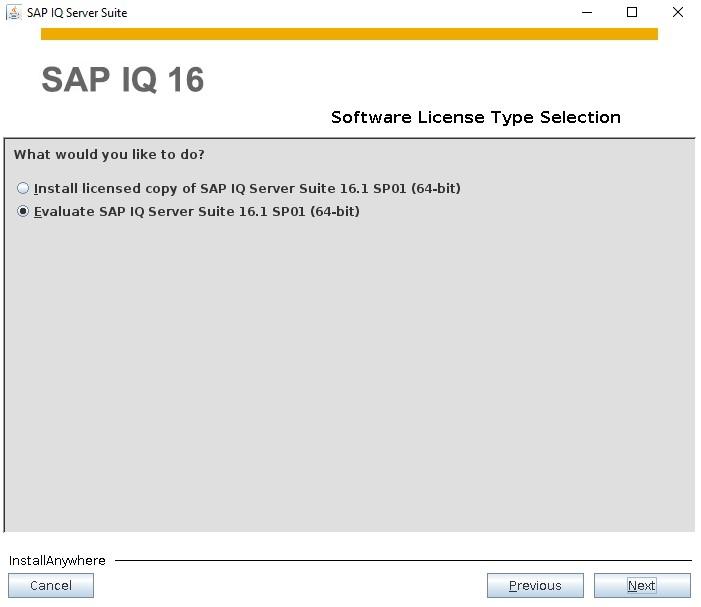
I will use an evaluation license for my demo.

Agree to the license terms.

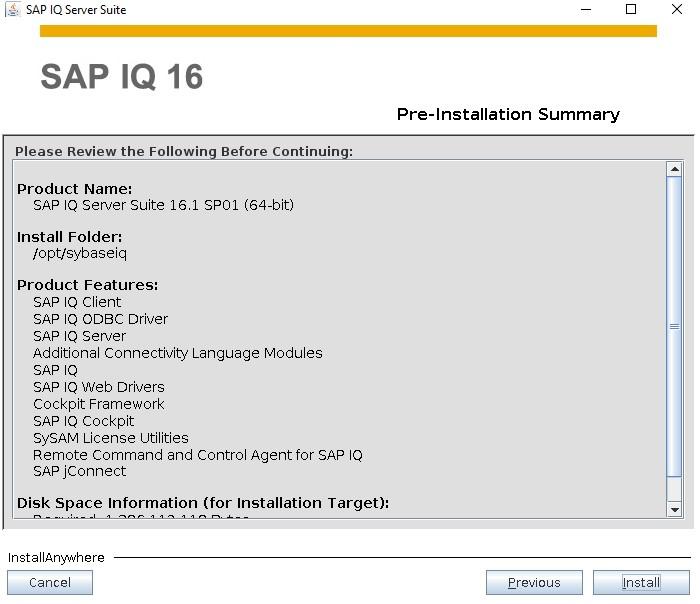
You can verify that what you chose is what you want.

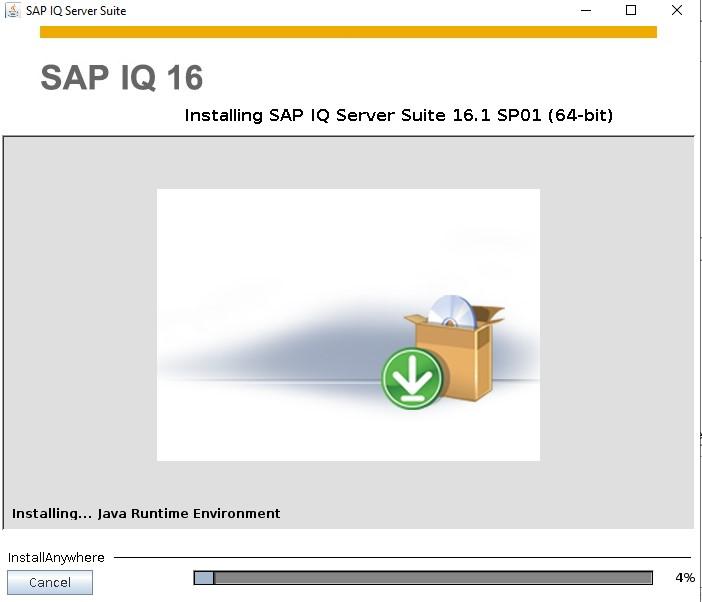
Once you verify that your selections are correct, install will begin – this should take several minutes.

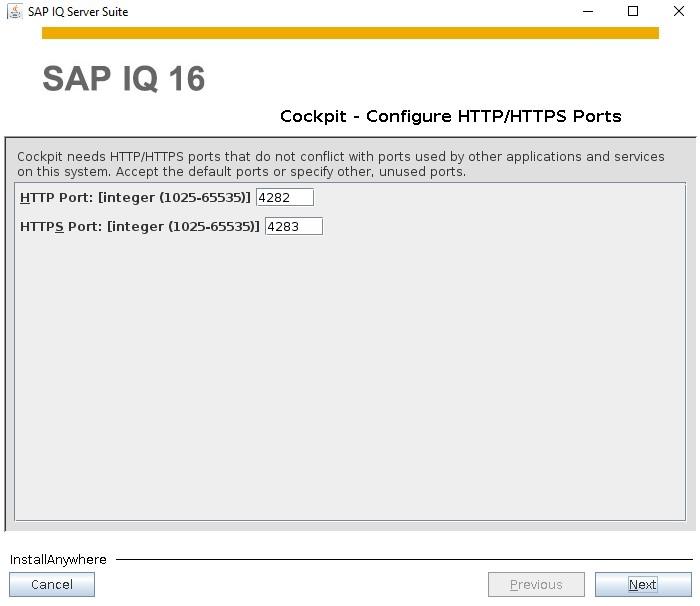
Configure HTTP/HTTPS ports for the cockpit.

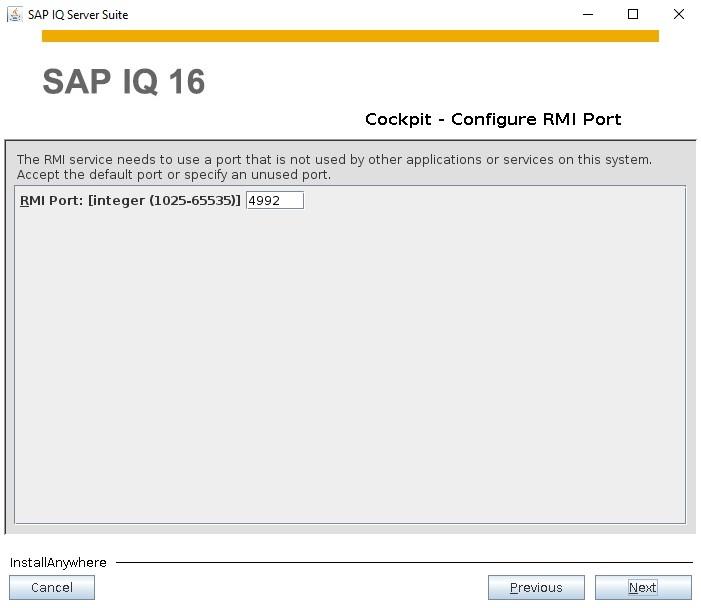
Configure the Cockpit RMI port to use.

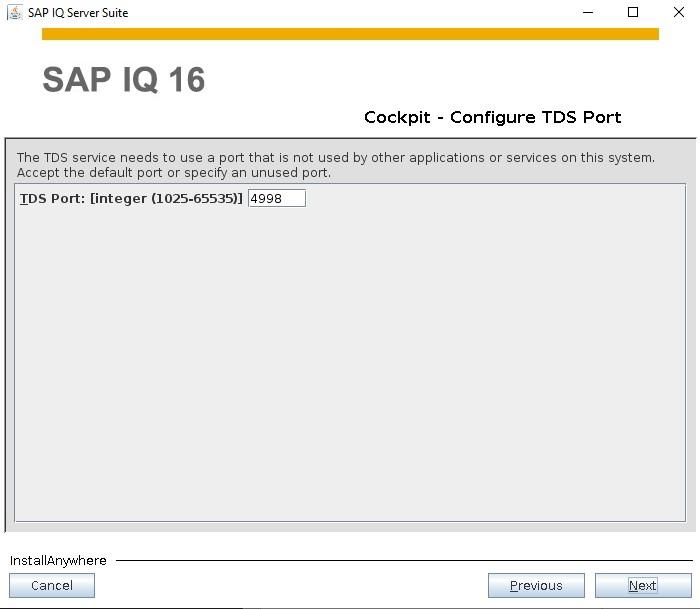
Configure the Cockpit TDS port to use.

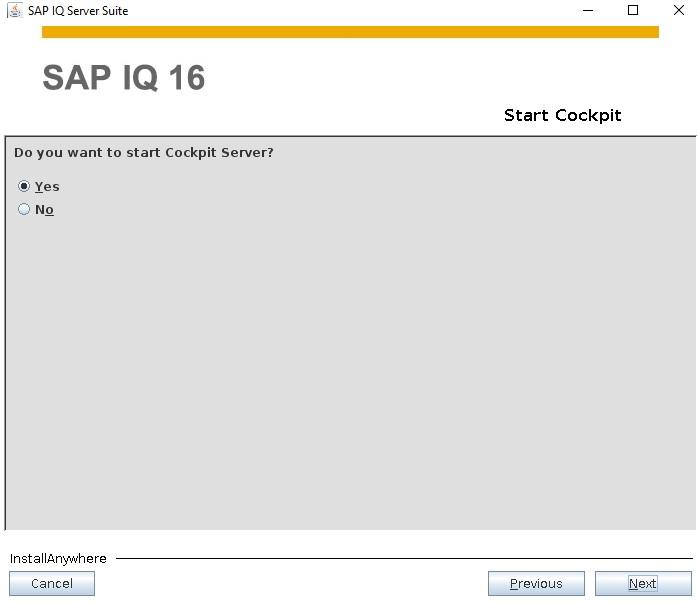
After configuring the ports then we get asked if we want to install Cockpit, I assume we do.

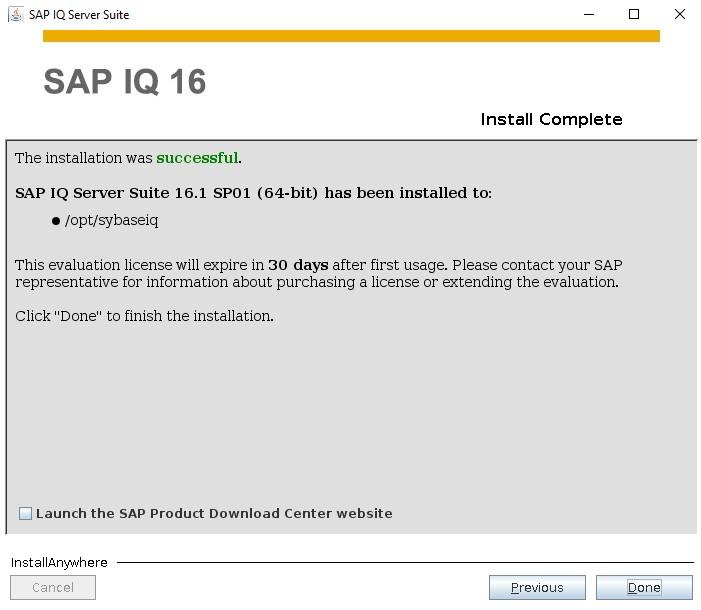
Assuming that everything was configured correctly then you should get a successful message. This concludes the installation of Sybase IQ.

Uninstalling SybaseIQ

If you want to uninstall Sybase IQ then you can use the uninstaller that get installed. This is found in <Sybase Path>/sybuninstall/IQSuite e.g. /opt/sybaseiq/sybuninstall/IQSuite and is called “uninstall”, run it as follows:

  • /opt/sybaseiq/sybuninstall/IQSuite/uninstall

Again, If X-Forwarding is correctly configured then you will get a GUI uninstaller, if not then you will once again get an interactive CLI.

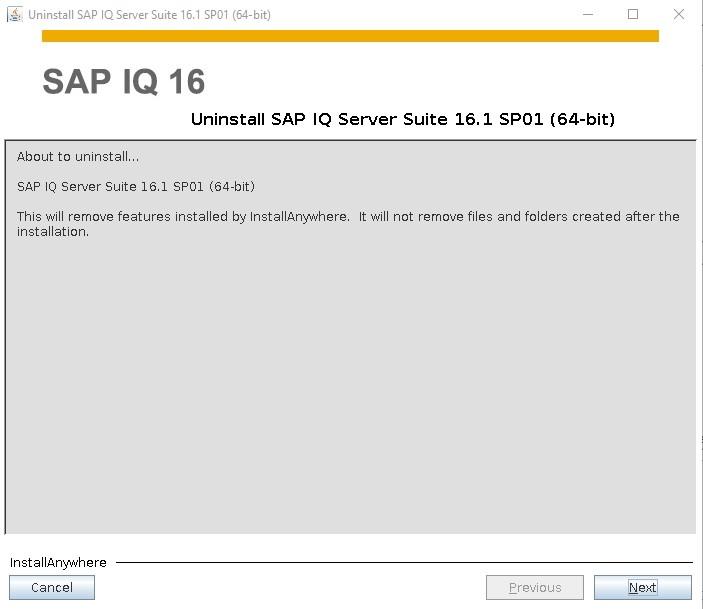
If we want to uninstall, then select Next.

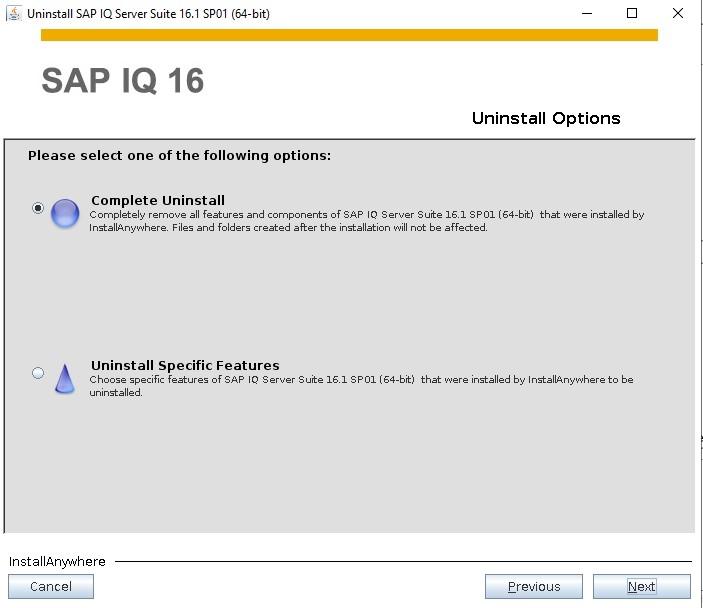
You can choose to remove just some features or in most cases I’d imagine you would want to perform a complete uninstall.

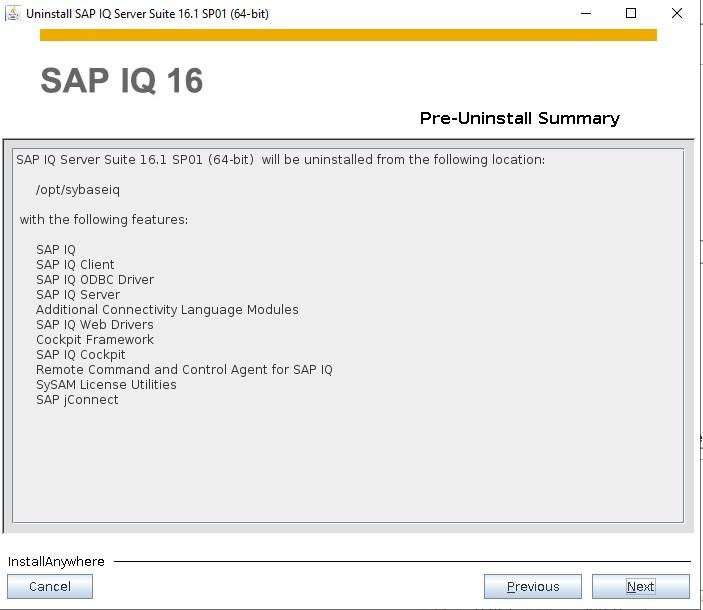
The uninstaller lets us know what it’s going to remove.

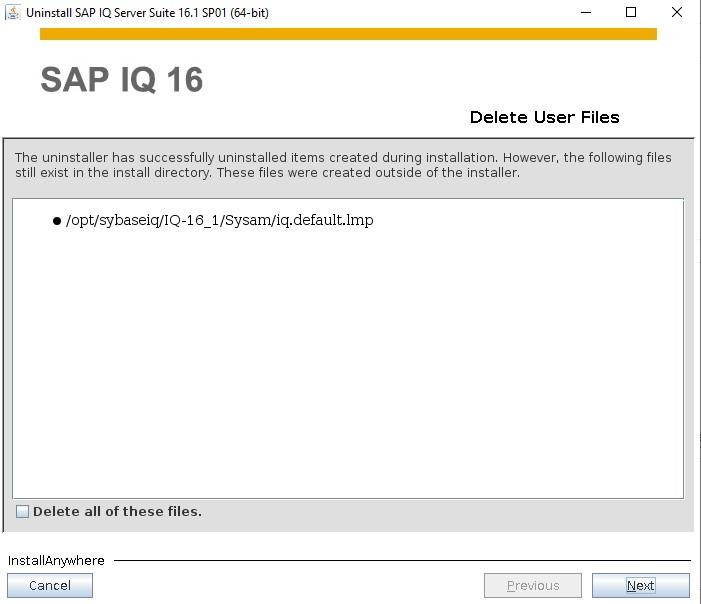
I selected to remove these user installed files too, because I wanted all the contents or /opt/sybaseiq removing.

Step 7: Configuring the demo database

Once you have installed Sybase IQ you will most likely want to configure the demo database so that we can use it with SIOS Lifekeeper.

Ensure that your Database Server has a correct entry in /etc/hosts, in my case I added a VIP to my system and then created an entry in /etc/hosts using the hostname IMA-SYBASE.

To install the demo, you need a location to install the database into e.g. /opt/demodb. You need to create this location and make sure it’s owned by the user who installed Sybase IQ. Change directory to that location e.g. “cd /opt/demodb”.

Run script to install the demo db; you need to pass a dba name and a dba password, “/opt/sybaseiq/IQ-16_1/demo/mkiqdemo.sh -dba sapdba -pwd sapdba”.

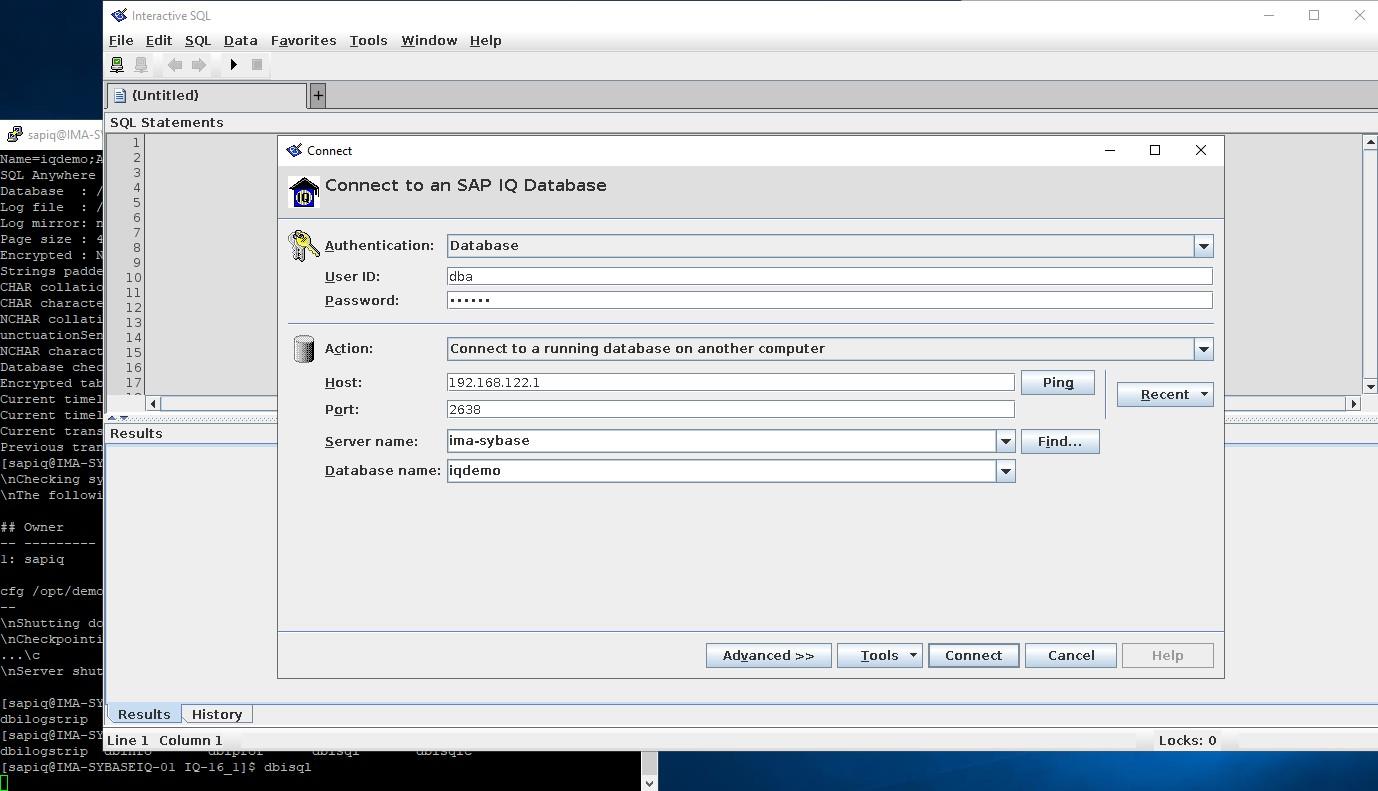
During the demo db installation, IQ is started and a database listener is started. You can use dbisql to test connectivity.

You can use Tools->Test Connection to make sure that you have the right connection details.

Once you successfully connect then you are ready to use SybaseIQ and your database.

Reproduced with permission from SIOS

Filed Under: Clustering Simplified Tagged With: SybaselIQ

  • « Previous Page
  • 1
  • …
  • 33
  • 34
  • 35
  • 36
  • 37
  • …
  • 104
  • Next Page »

Recent Posts

  • Transitioning from VMware to Nutanix
  • Are my servers disposable? How High Availability software fits in cloud best practices
  • Data Recovery Strategies for a Disaster-Prone World
  • DataKeeper and Baseball: A Strategic Take on Disaster Recovery
  • Budgeting for SQL Server Downtime Risk

Most Popular Posts

Maximise replication performance for Linux Clustering with Fusion-io
Failover Clustering with VMware High Availability
create A 2-Node MySQL Cluster Without Shared Storage
SAP for High Availability Solutions For Linux
Bandwidth To Support Real-Time Replication
The Availability Equation – High Availability Solutions.jpg
Choosing Platforms To Replicate Data - Host-Based Or Storage-Based?
Guide To Connect To An iSCSI Target Using Open-iSCSI Initiator Software
Best Practices to Eliminate SPoF In Cluster Architecture
Step-By-Step How To Configure A Linux Failover Cluster In Microsoft Azure IaaS Without Shared Storage azure sanless
Take Action Before SQL Server 20082008 R2 Support Expires
How To Cluster MaxDB On Windows In The Cloud

Join Our Mailing List

Copyright © 2025 · Enterprise Pro Theme on Genesis Framework · WordPress · Log in