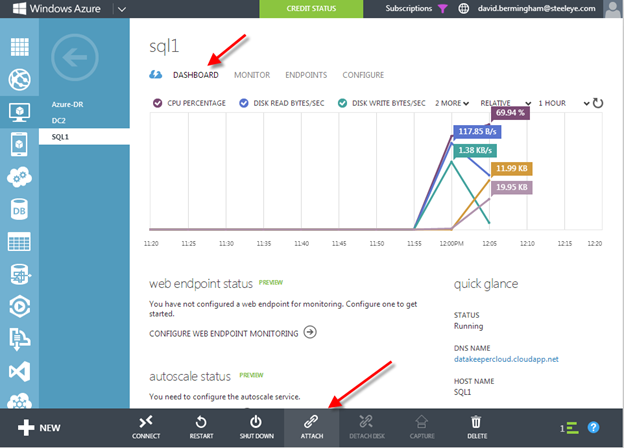
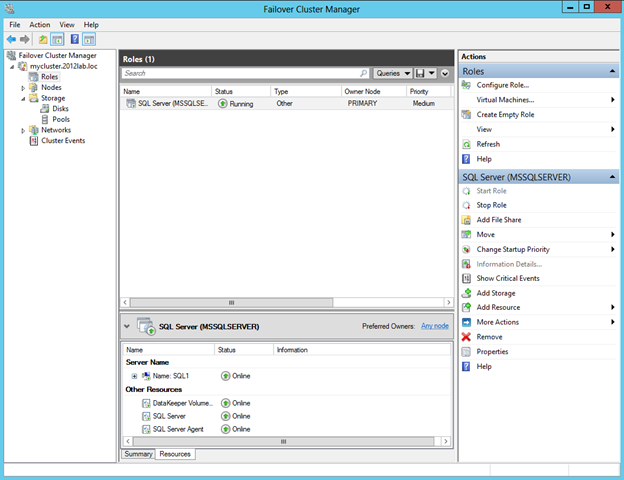
New Azure ILB Feature Allows You To Build A Multi-Instance SQL Server Failover Cluster In Azure
The new feature, Cloud Witness is my favourite at the moment. Before we look at the new quorum features in Windows Server 2016, I think it is important to know where we came from. In my previous post Understanding the Windows Server Failover Cluster Quorum in Windows Server 2012 R2 I went into some great detail regarding the history and evolution of the cluster quorum. I suggest you review that post to understand how the quorum works in Windows Server 2012 R2. Also, how the new features of Windows Server 2016 are going to make your cluster deployments even more resilient.
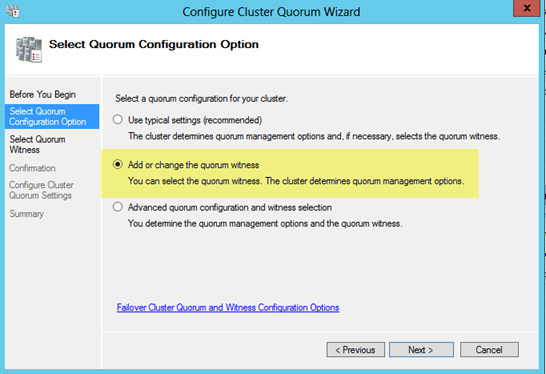
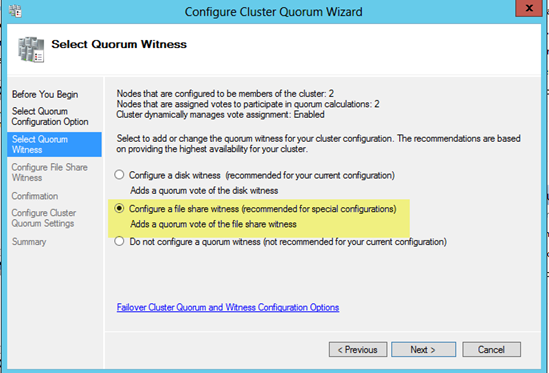
Cloud Witness
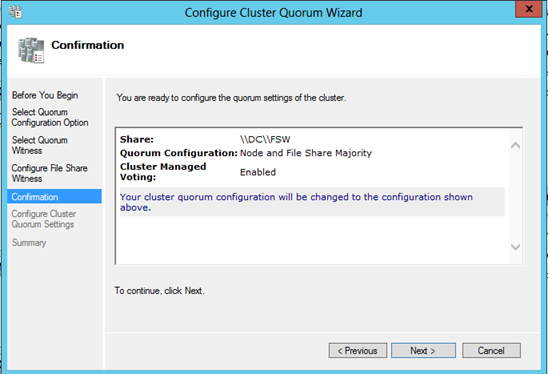
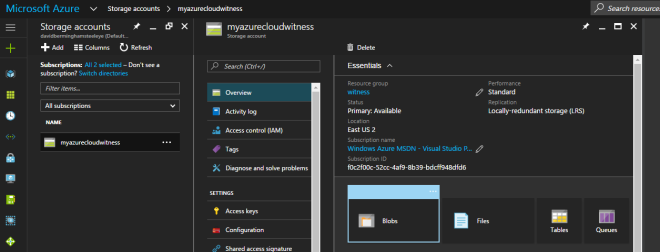
A Cloud Witness allows you to leverage Azure Blob Storage to act as a witness for your cluster. This witness would be in place of a Disk Witness or File Share Witness. The configuration of a Cloud Witness is extremely easy. From my experience costs next to nothing to host in Azure. The only downside is that the cluster nodes will need to be able to communicate over the internet to with your Azure Blob Storage. Very often cluster nodes are forbidden to communicate over to the public internet. So you will need to coordinate with your security team if you want to enable a Cloud Witness.
There are many compelling reasons for using a Cloud Witness to build the Multi-Instance SQL Server Failover Cluster In Azure. But for me it makes most sense in three very specific environments: Failover Cluster in Azure, Branch Office Clusters, and Multisite Clusters.
On A Closer Look
Let’s take a look at each of these scenarios to see how a Cloud Witness can help.
Highly Available Deployments
If you are moving to Azure (or really any cloud provider), you will want to make sure your deployments are highly available. If you are taking about SQL Server, File Servers, SAP or other workloads traditionally clustered with Windows Server Failover Clustering, you will need to use either a File Share Witness or a Cloud Witness, since a Disk Witness is not possible in Azure. With Windows Server 2012 R2 or Windows Server 2008 R2, you will need to use a File Share Witness. Windows Server 2016 makes it possible to use a Cloud Witness. The advantage of a Cloud Witness is that you don’t have to maintain another Windows instance in Azure to host the File Share. Instead, Microsoft allows you to leverage Blob Storage. This gives you a less expensive solution, one that is much easier to manage, and more resilient.
Location
When looking at cluster deployments in branch offices, cost and maintenance is always a consideration. For a retail chain with hundreds or thousands of locations, having a SAN in each location can be cost prohibitive. Each location might to run a two node Hyper-V cluster on a S2D Hyper-converged configuration or a 3rd party replication solution to host a number of virtual machines. Now what a Cloud Witness can do is to help the business avoid the cost of adding an additional physical server in each location to act as a File Share Witness or the cost of adding a SAN to each location.
Eliminates The Need For A 3rd Data Center
And finally, when deploying a multisite cluster, the Cloud Witness eliminates the need for a 3rd data center to host the File Share Witness. Before the introduction of the Cloud Witness, best practice would dictate that the File Share Witness reside in a 3rd location. Access to a 3rd datacenter just to host a file share witness was not always feasibly and certainly introduced another layer of complexity. By using a Cloud Witness you eliminate the need to maintain a 3rd location and access to the witness is done over the public internet, minimizing the network requirements as well.
Site Awareness
When building a multisite cluster, there has always been another common problem. Controlling the failover to always prefer the local site was not possible. While you could specify Preferred Owners, the Preferred Owners setting is commonly misunderstood. Administrators may not have realized this. But do you know even if they didn’t list a server as Preferred Owner, the server is automatically appended to the end of the Preferred Owners list maintained by the cluster. The result of this misunderstanding is that although you may have only listed the local servers as Preferred Owners, you could potentially have a cluster resource failover to the DR site. And this is even when there is a perfectly good node available in the local site. Obviously this is not what you expect and using Site Awareness will eliminate this problem moving forward.
Site Awareness fixes this problem by always preferring the local site when deciding which node to bring online. So in a normal circumstance a clustered workload will always failover to a local node unless you have a complete site outage. In which case one of the DR nodes will come online. The same holds true once you are running in the DR site. The cluster will recover the workload on a server in the DR site if it was previously running on a node in the DR site. Site Awareness will always prefer a local node.
Fault Domains
Building upon site awareness is Fault Domains. Fault Domains goes a step further and lets you define Node, Chasse, and Rack locations in addition to Site. Fault Domains have three benefits: Storage Affinity in a Stretch Cluster, increases Storage Spaces resiliency. It enhances the Health Services alerts by including meta data about the location of the associated resources raising the alarm. Storage Affinity will help ensure that your cluster workloads and storage are running in the same location. You certainly wouldn’t want your VM reading and writing data that is sitting on a CSV in a different city.
However, I think the biggest winner here is the Storage Spaces Direct (S2D) scenario. SD2 will leverage the information you provide about your cluster nodes location (Site, Rack, Chassis) to ensure that the multiple copies of data that is written for redundancy all live in different Fault Domains. This helps ensure that data placement is optimized so that the failure of a single Node, Chassis, Rack or Site does not bring down your entire S2D deployment. Cosmos Darwin has an excellent video on Channel 9 that explains this concept in great detail.
Summary
Windows Server 2016 adds several new enhancements to the cluster quorum that will provide some immediate benefits to your cluster deployments. In addition, check out some of the other great new cluster enhancements like rolling system upgrade, Virtual Machine Resiliency, Workgroup and Multi-Domain Clusters and others.
To read about other tips such as building a new Multi-Instance SQL Server Failover Cluster In Azure with Cloud Witness, have a read at our posts.
Reproduced with permission from Clusteringformeremortals.com


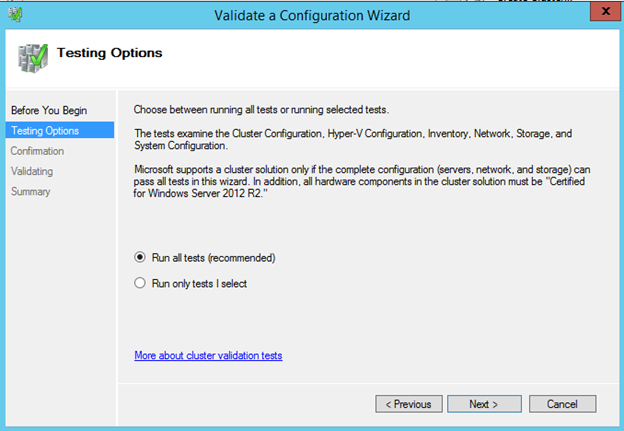


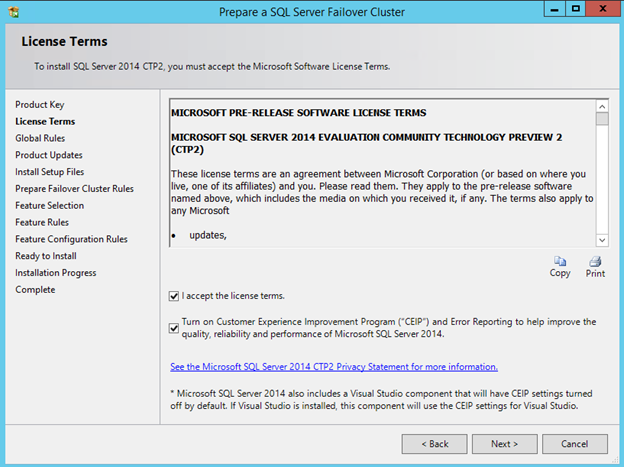

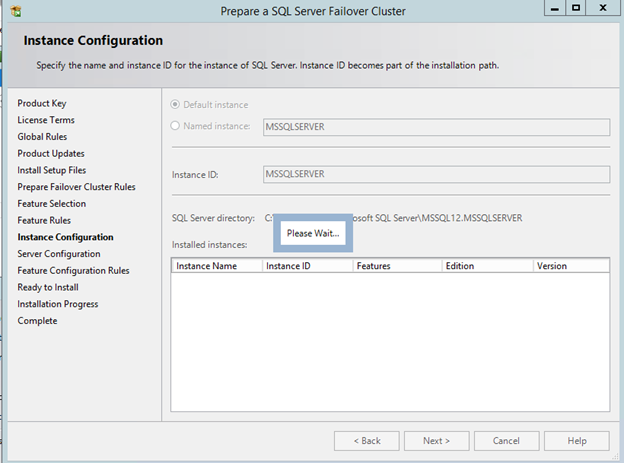


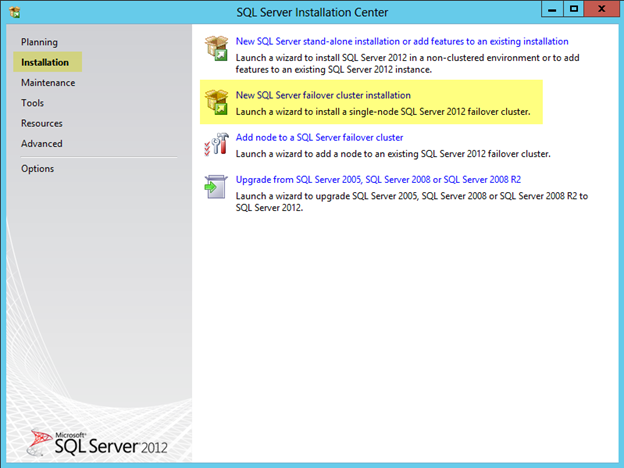


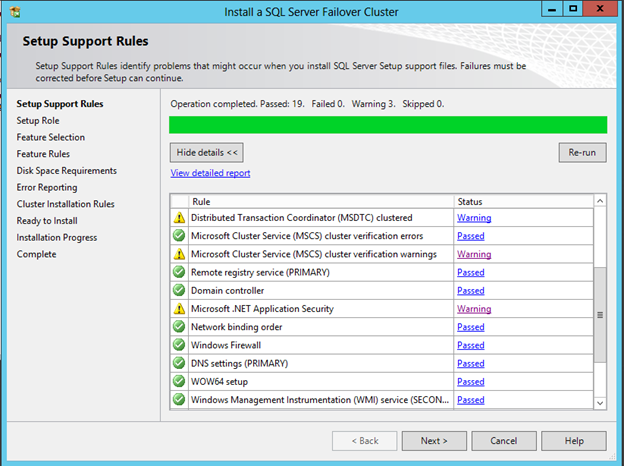
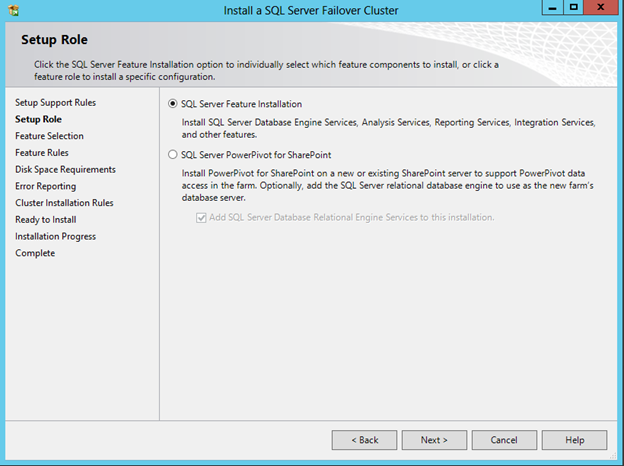
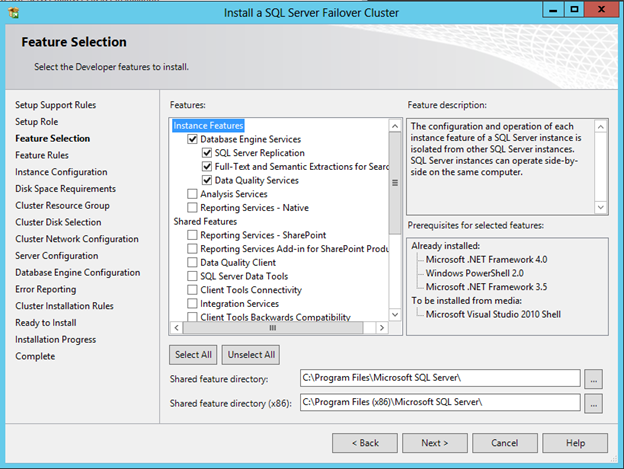
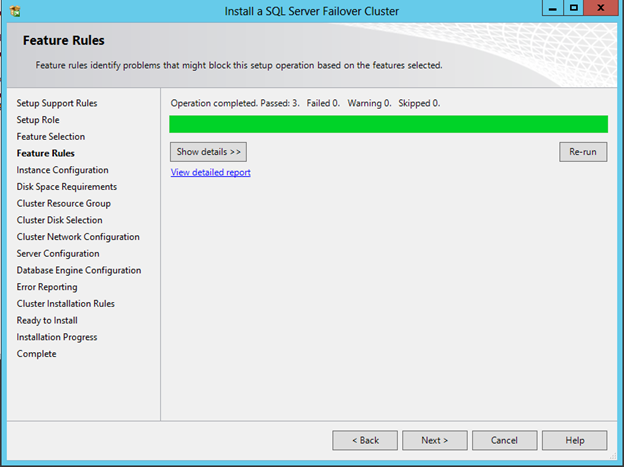


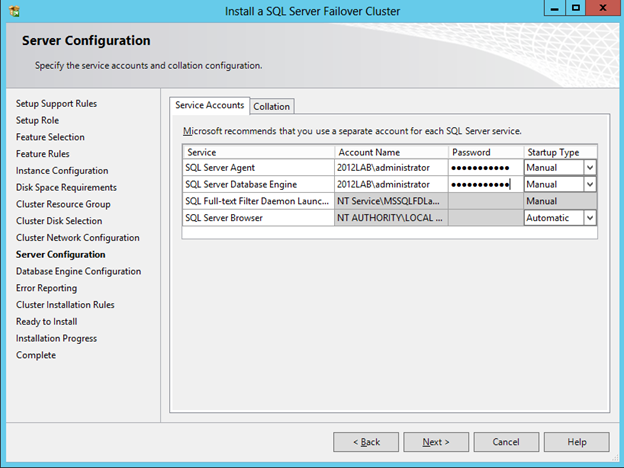
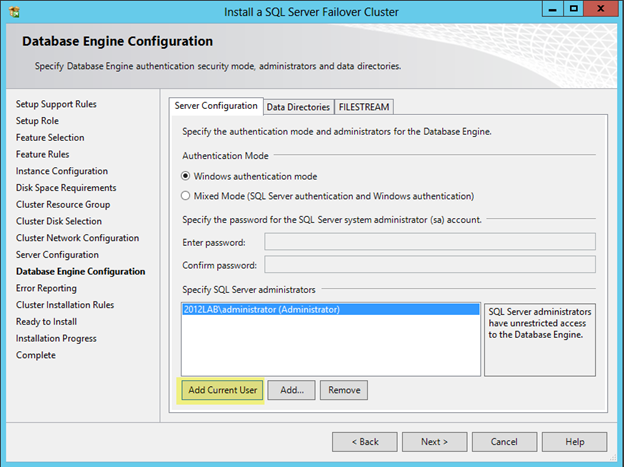

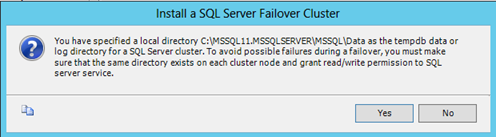
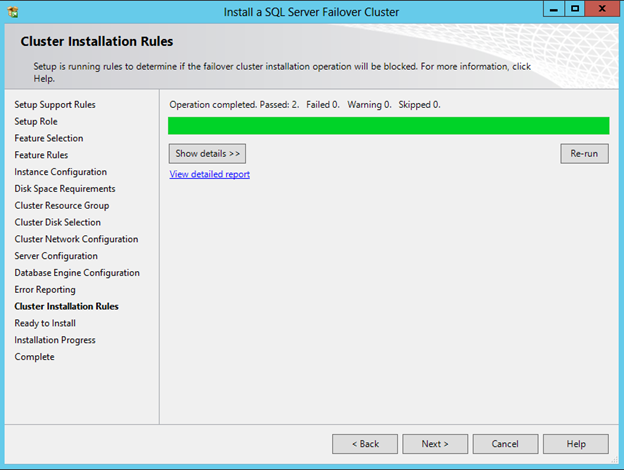


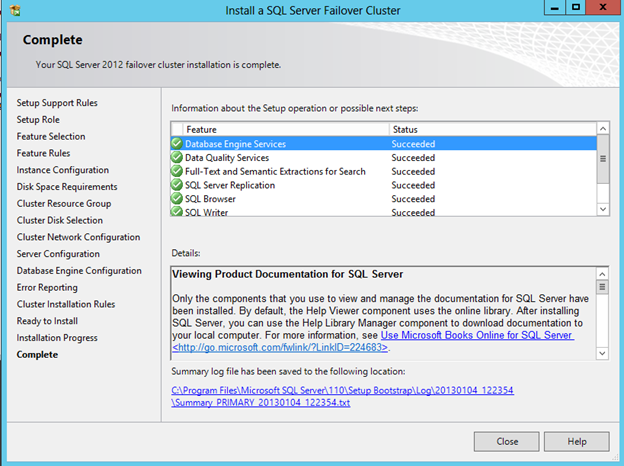


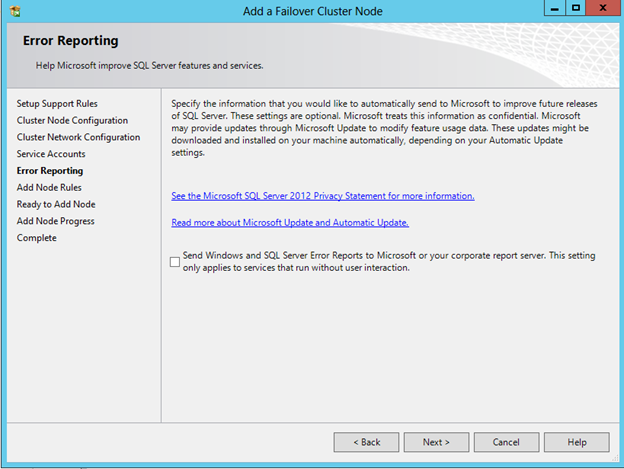
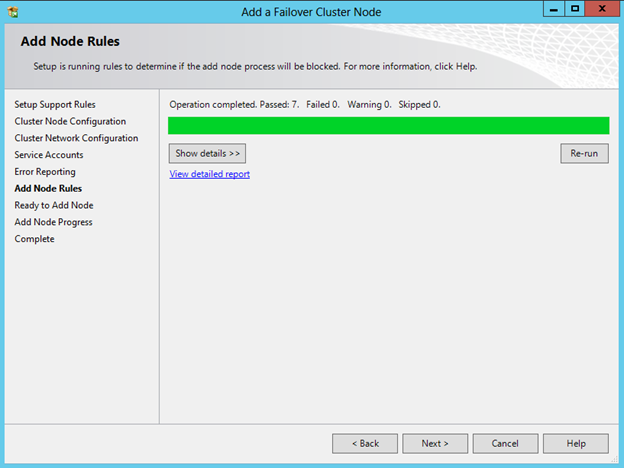


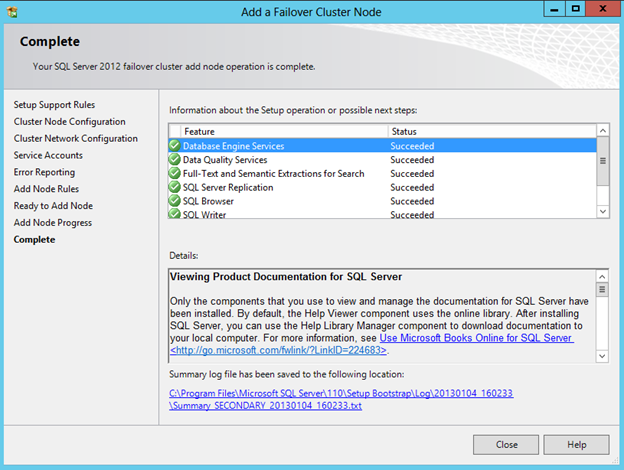
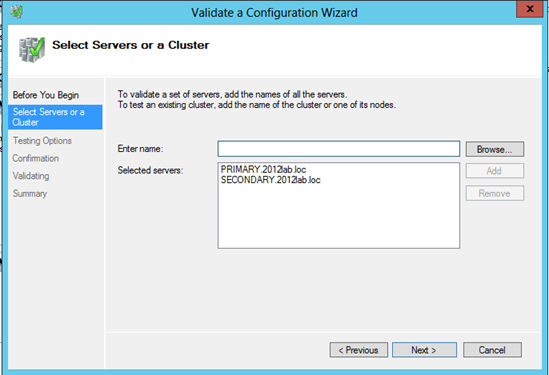
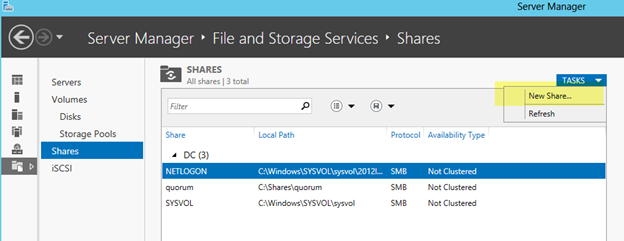
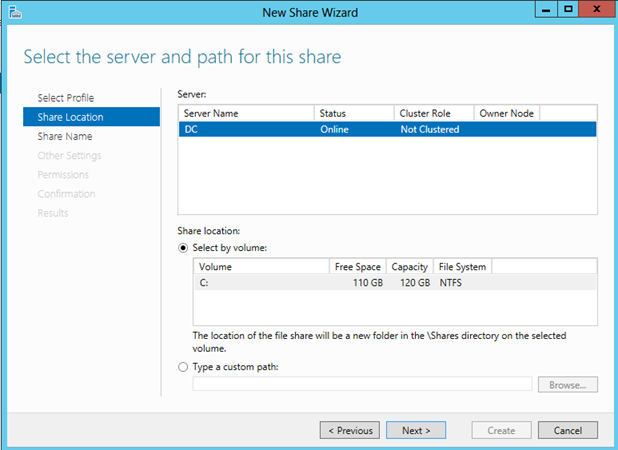
 This article “clustering SQL Server 2012 in a Windows Server 2012 cluster” was meant to be just a quick run through on how to install SQL 2012 in a Windows Server 2012 cluster. For additional reading start
  Choose Role-based or feature-based installation
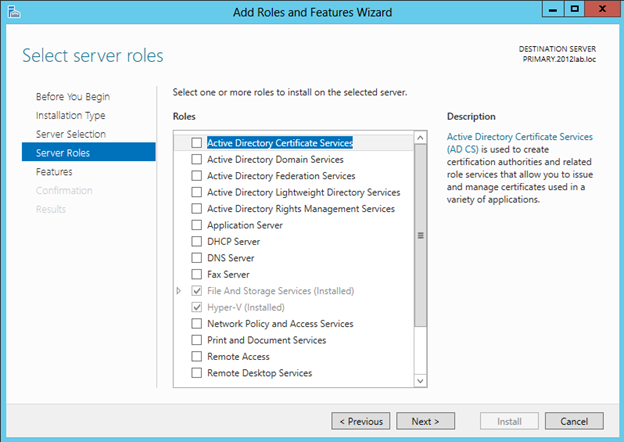
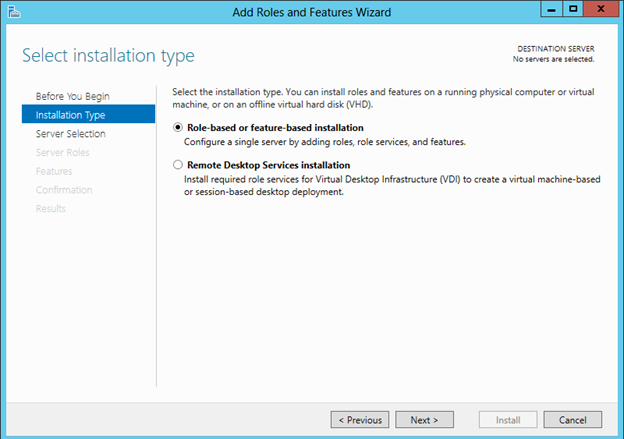 Choose the server on which you wish to enable the failover cluster feature